On Heavy Backpacks and Hernia Belts

It has been a long time since I’ve posted on the OstomyOutdoors.com. Just because I have been quiet doesn’t mean life has been void of adventures. In fact, the reality has been quite the opposite. This has been an incredible year full of many wonderful trips in the wilds. In fact, Doug and I spent the most nights backpacking in the wilderness together this year than we have at any other point in our lives. A total of 25 nights were spent in the backcountry.

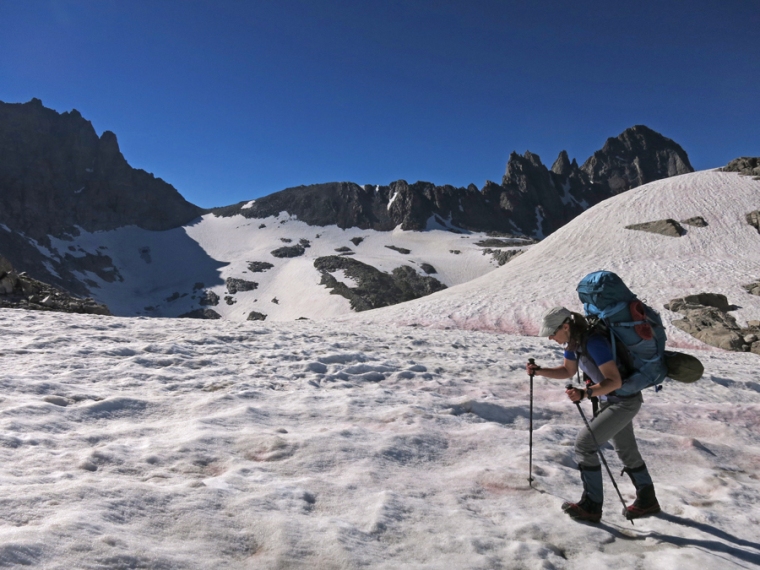
The biggest of these trips was a 16-day, 90-mile-long backpack in the Wind River Range of Wyoming in August. What made this trip unique is that it was unsupported; we carried all of our food and fuel with no resupply along the way. This led to us both carrying very heavy loads: our packs on the first day of the trip were over 70 pounds.

Entering-the-wilderness-for
I head out on day one of our 16-day trip with my 70-pound pack. Famous Squaretop Mountain is in the background.
Into-the-mtns-for-web
Only 11 miles to go until camp! I made it, but it was a tough day.

Yes, that is an unusually heavy pack. However, depending on the season, my typical pack weight is still anywhere from 35-55 pounds on mountain trips that are over three days. I am sure all my ultralight backpacking friends are cringing!

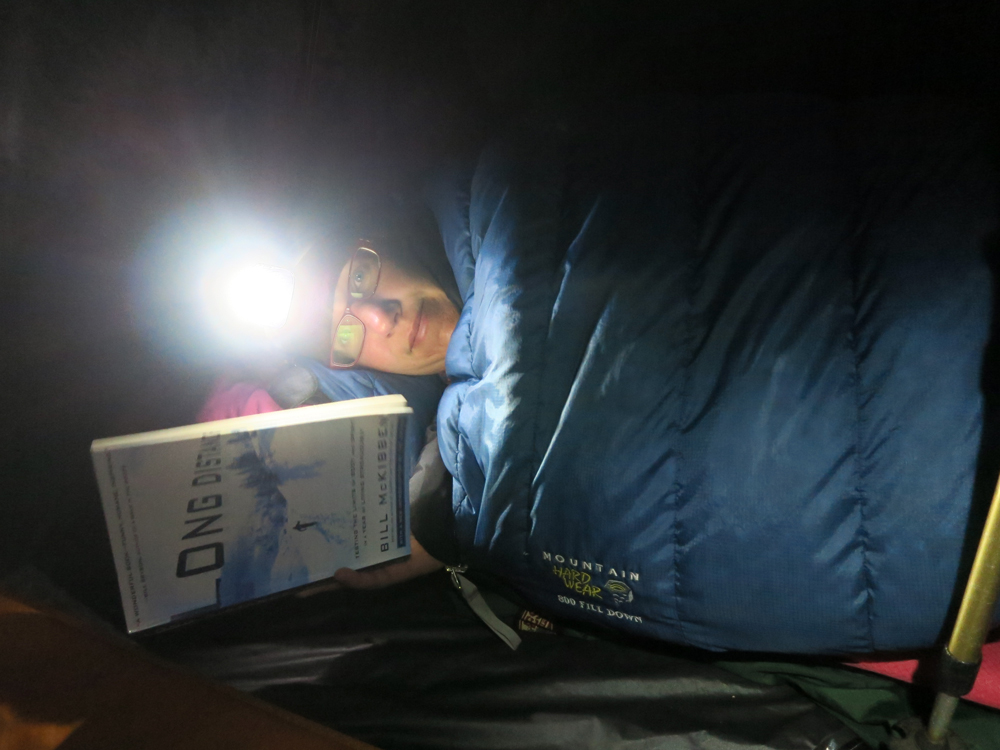
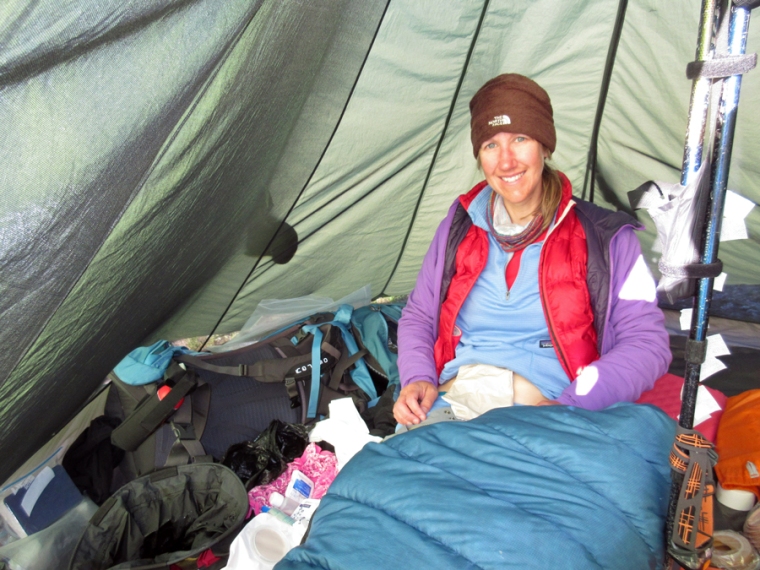
Though I have incorporated lightweight gear and packing strategies into my backpacking system, an extreme sensitivity to cold (I am wearing a hat and down jacket in my 68-degree home as I type this) means I must bring a higher-than-average amount of insulating clothing and a very warm down sleeping bag–even in the summer season. I also have Raynaud’s Disease which limits blood flow to my extremities when I am chilled. My fingers and toes become waxy-white and numb and are at an increased risk for cold injury such as frostbite.

Packing-up-for-web
At our Peak Lake campsite, Doug shakes out my 15-degree, 800-fill down sleeping bag. It is a great lightweight bag, but wasn’t warm enough for me on this trip. I had to sleep in every layer I brought along and eventually borrowed Doug’s jacket after several sleepless nights due to being teeth-chatteringly cold. Also, we brought our pyramid shelter which is light but spacious (I dislike being crammed in a tiny tent.) It uses our hiking sticks for a center pole which saves weight. Often we will use the shelter without the inner netting which makes it even lighter. However, on our Wind River Range trip there were too many mosquitoes for that option.
Creek-crossing-for-web
Our trip in the Wind River Range included many river crossings. The stylish rubbery red shoes I am wearing are Vivobarefoot Ultra 3s. They are lightweight and allow me to safely cross streams without injuring my feet or getting my boots wet (which causes Raynaud’s Disease symptoms in my feet.) They also double as great camp shoes.

Mix the extra weight of these body-warmth necessities with the added ounces of spare ostomy supplies, the bear-proof food storage containers that are increasingly being required on public lands in the west and a few minor luxury items like my sketchbook, and the pounds add up. I am quite sure I am never going to be carrying a 25-pound pack on any trip that is more than an overnighter.

Sketch-for-web
My sketchbook and small set of watercolors never stays home.
Packing-food-for-web
Our 16-day trip in the Wind River Range involved hiking in black and grizzly bear country so special food storage regulations were in place. The white bags in this photo are called Ursack AllMiteys. They are bear- and rodent-proof and are much lighter to carry than regular plastic bear canisters. Fortunately they were a permitted food storage method in the Wind River Range (they are not yet approved for all public lands.) We brought four Ursacks full of food on our trip plus one additional stuff sack full to hang for the first few nights. It was tough figuring out how much food to bring, but we did well and only went home with a few spare energy bars. We each carried 26 pounds of food.
Ostomy-change-for-web.jpg
My spare ostomy supplies weighed about two pounds. I changed my appliance four times on the trip– once every four days. When it is cold or buggy, I usually change in the tent. Fortunately, my output is fairly thick and things are mess-free if I wrap strips of paper towel around my stoma as I work.
Ostomy-supplies-for-web
Here is a close-up photo of my supplies as I work on my change in the tent. Though I only changed four times, I brought enough stuff for eight swaps just to be safe. To keep my supplies as lightweight as possible, I did not bring any closed-end pouches as I sometimes do in case I run into situations where it may be difficult to empty. This meant I was always digging holes (about 70 on the whole trip) including at night and in the rain.

For the most part, I seem to do well as a “pack mule.” For a couple of summers during my late 20s, I worked for the National Outdoor Leadership School (NOLS) instructing 30-day wilderness backpacking courses. We carried monster packs on those trips– something my body seems to have retained the muscle-memory for despite 20 years passing by.  However, one of my biggest concerns when hauling a heavy load– or during any strenuous activity for that matter– is developing a parastomal hernia. So far I have avoided getting one and I would like to keep it that way.

So what do I do to safeguard myself?

First, I made sure to work back into exercise slowly after surgery– especially during the first year post-op. For my early post-surgery backpacking trips, I double-checked my pack weights with my surgeon to make sure it was okay for me to carry various loads. After a while, he said it was fine to listen to my body.

Secondly, I keep my core strong by doing planks and other ab-friendly exercises (once I recovered fully from surgery and got my doctor’s okay, of course!). I also am mindful of not gaining excess weight by eating a healthy diet and exercising regularly. Being overweight can cause pressure against the abdominal wall and increase one’s risk of parastomal hernia.

In addition, Doug lifts my pack up to my back when it is over about 50 pounds. Once the pack is centered on my hips and legs, my core is not stressed at all.

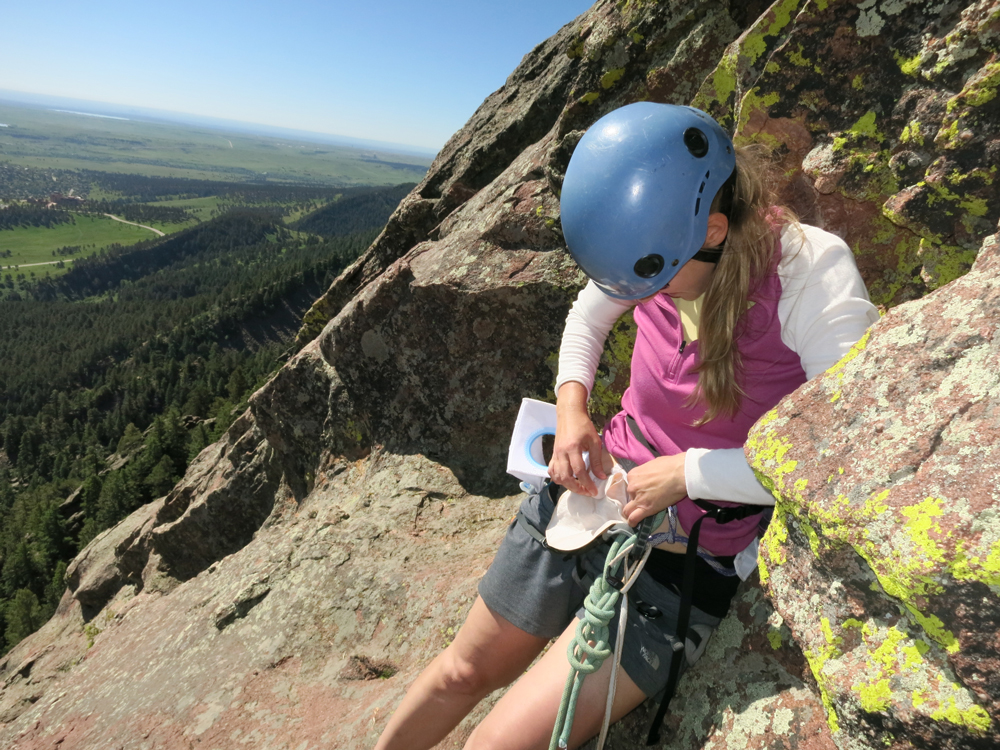
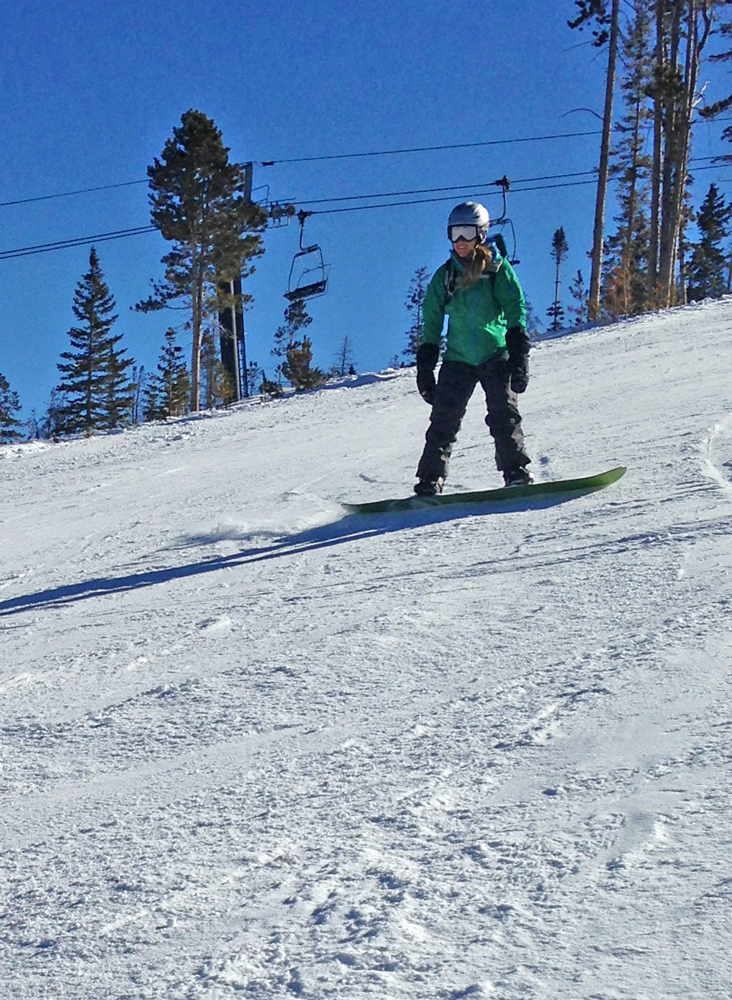
Beyond that, my most important tool is a hernia prevention belt. Though I have heard mixed opinions from surgeons on the degree to which these belts actually prevent hernias, the abdominal muscles around my stoma absolutely feel more supported when I wear it during activities that could be hard on the core. These include backpacking, mountaineering, rock climbing, weight lifting, snowboarding, Zumba, yoga, and coughing/sneezing when I have a cold or the flu! I figure it can’t hurt to stack the odds in my favor by using a belt.

So which belt do I use?

I wanted a belt that provided substantial support for the abdominal wall around my stoma, not just a stretchy band. My WOC nurse recommended the NU-Hope hernia belts so that is the brand I went with. I wear their Flat Panel model in the Cool Comfort Elastic option (shown on page 5 of the Nu-Hope link below.) This belt is designed with prevention in mind and is made of a breathable mesh that works great for activities that work up a sweat. It comes in various widths. I use the 6-inch wide model for most of my activities as I find it the most comfortable. The one exception is for yoga when this size prevents me from bending. Instead, I use the four-inch-wide belt for yoga.

Nu-Hope also makes models with even more support for those who already have a hernia. The belts have a hole for the pouch to extend through that is specific to the size of your flange. If you ever change the wafer size of your appliance, you  will have to get a new belt. Nu-Hope can also make custom belts if the regular sizes don’t work well with your appliance or stoma location.

Nu-Hope has a great online guide for explaining belt sizing.

http://www.nu-hope.com/beltlit.pdf

I also found the Nu-Hope staff to be extremely helpful when I called with questions on sizing before ordering my first belt. Nu-Hope does not sell belts directly. Once you know your  style and size, you order through your main ostomy medical supply company. Also make sure to check your insurance policy as it may cover a portion of your hernia belt.

Hernia-belt-for-web.jpg
Nu-Hope belts come in various widths and colors. Pictured here are the six-inch- and four-inch-wide belts in white and beige in the Flat Panel Cool Comfort Elastic option. Note that the circular portion is sized for your specific flange measurements. Belts come in standard sizes, but Nu-Hope can also make custom ones.
Cool-Comfort-Elastic-for-we.jpg
The Cool Comfort Elastic belt is made out of a breathable mesh and is wonderful for active pursuits.

I only use Nu-Hope Hernia prevention belts, but there are other brands out there. Quite a few manufacturers claim that their products are designed for hernias, but I would suggest checking with your WOC nurse for their brand recommendations. You want to make sure you get a belt that provides firm enough support and they would know which belts patients have had good experiences with.

Even though I love my Nu-Hope Flat Panel belt, I do pair it with a couple of other things to improve its performance.

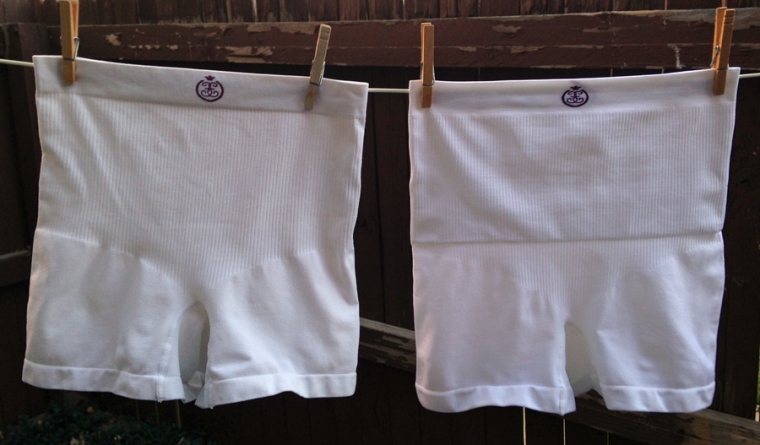
First, because the width of my waist is smaller than my hips, the belt does tend to ride up to that narrow spot. I remedy this by always wearing my belt under a pair of Comfizz brand High-waist ostomy boxers or briefs. This underwear does an exemplary job of holding the belt in place so it doesn’t shift. In fact, I love these underwear for sports whether or not I am pairing them with my hernia belt. They are also wonderful for concealing your ostomy appliance under form-fitting pants and dresses. Comfizz is a brand out of the UK, but their products are reasonably priced and ship to the USA incredibly quickly. They also have great customer service!

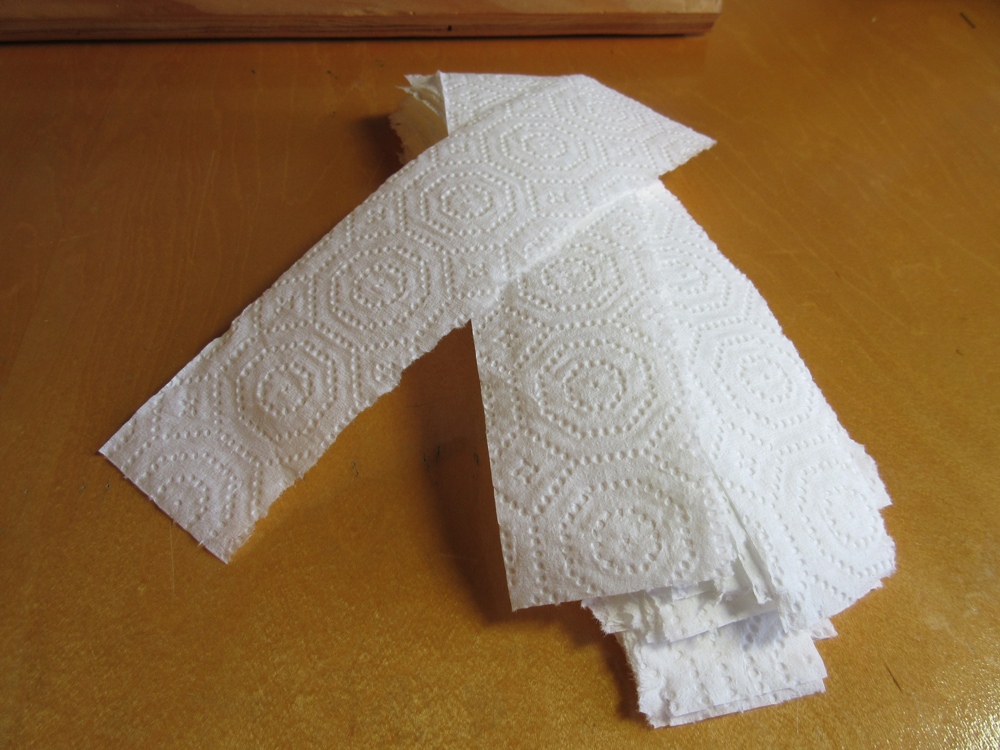
Second, I do get some skin chaffing and soreness from the hernia belt when it is compressed under my backpack hip belt– especially with very heavy loads. I remedy this by sliding some 8″ by 8″ squares of polar fleece in between the hernia belt and my skin. This adds a bit of cushion and prevents friction. Fortunately, the fleece doesn’t make the hernia belt too much warmer to wear, as those areas would be under my thick, non-breathable pack waist belt anyway.

Hernia-belt-layering-for-we
Pictured are the layers I wear for backpacking when a hip belt can cause extra pressure on the belt and my skin. I wear Comfizz Level-one Boxers over the hernia belt to keep it from riding up. I put a layer of folded fleece between my belt and skin to prevent chafing and soreness.
Hernia-belt-1
Putting on my hernia prevention belt set up before shouldering my heavy pack. All the layers mentioned above can be seen. I also wear a cotton pouch cover to keep the plastic corners of my pouch from chafing my leg. Yes– this is many layers but they are oh-so comfortable!
Hernia-belt-climbing-for-we
This set-up works great for rock climbing too, though I usually don’t need the cushioning fleece pieces without the weight of a heavy pack pressing on my hernia belt.

In the first couple of years after surgery, I used my Nu-Hope hernia prevention belt during all exercise. However, as the years went by and my core got stronger, it felt like overkill for some of my milder activities such as running, cross-country skiing and bicycling. However, I still like some abdominal support when engaging in these sports and found a product I love for them: Comfizz Level-two boxers.  Similar in shape to the regular Comfizz Level-one Boxers, the Level-two have an extra-thick section of stretchy fabric over the abdomen which provides really nice support when I don’t want to wear a full-on hernia belt for less core-intensive exercise. These undergarments are also available as briefs if you prefer that style over boxers.

Comfizz-level-one-and-two-b
On the left are Comfizz Level-one Boxers and on the right are Level-two. You can see the thicker fabric panel on the Level-two Boxers. These undergarments are also available as briefs rather than boxers.

Though there is no way to completely safeguard oneself against a parastomal hernia, these products help me feel much more secure during all my active pursuits. If a hernia or fear of developing one is keeping you from getting out in the wilds, I would encourage you to talk to your WOC nurse and medical team and explore belts and other options that could offer protection.

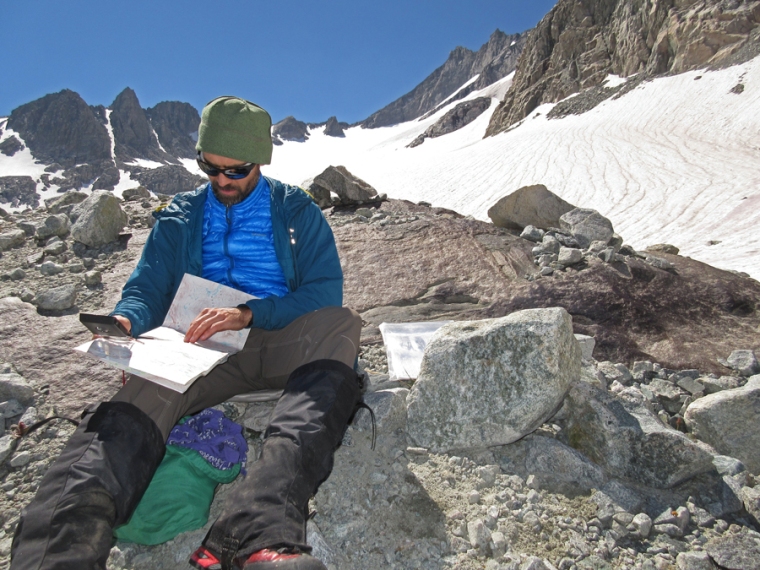
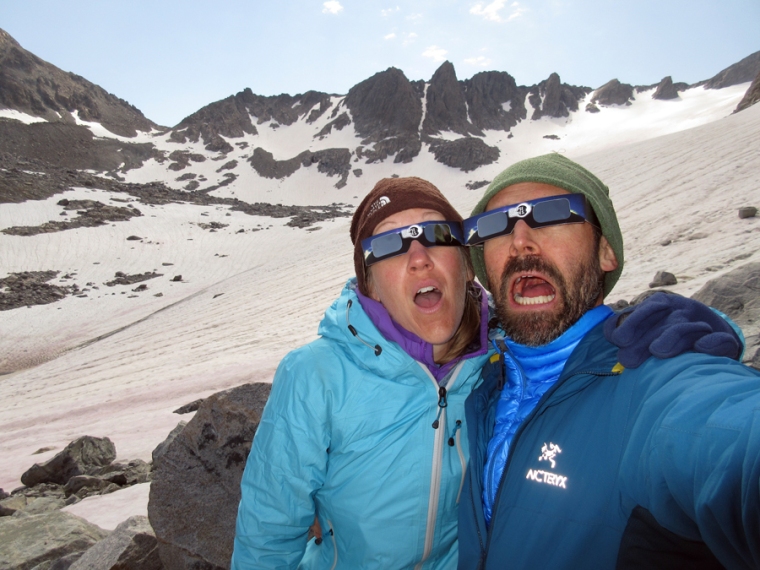
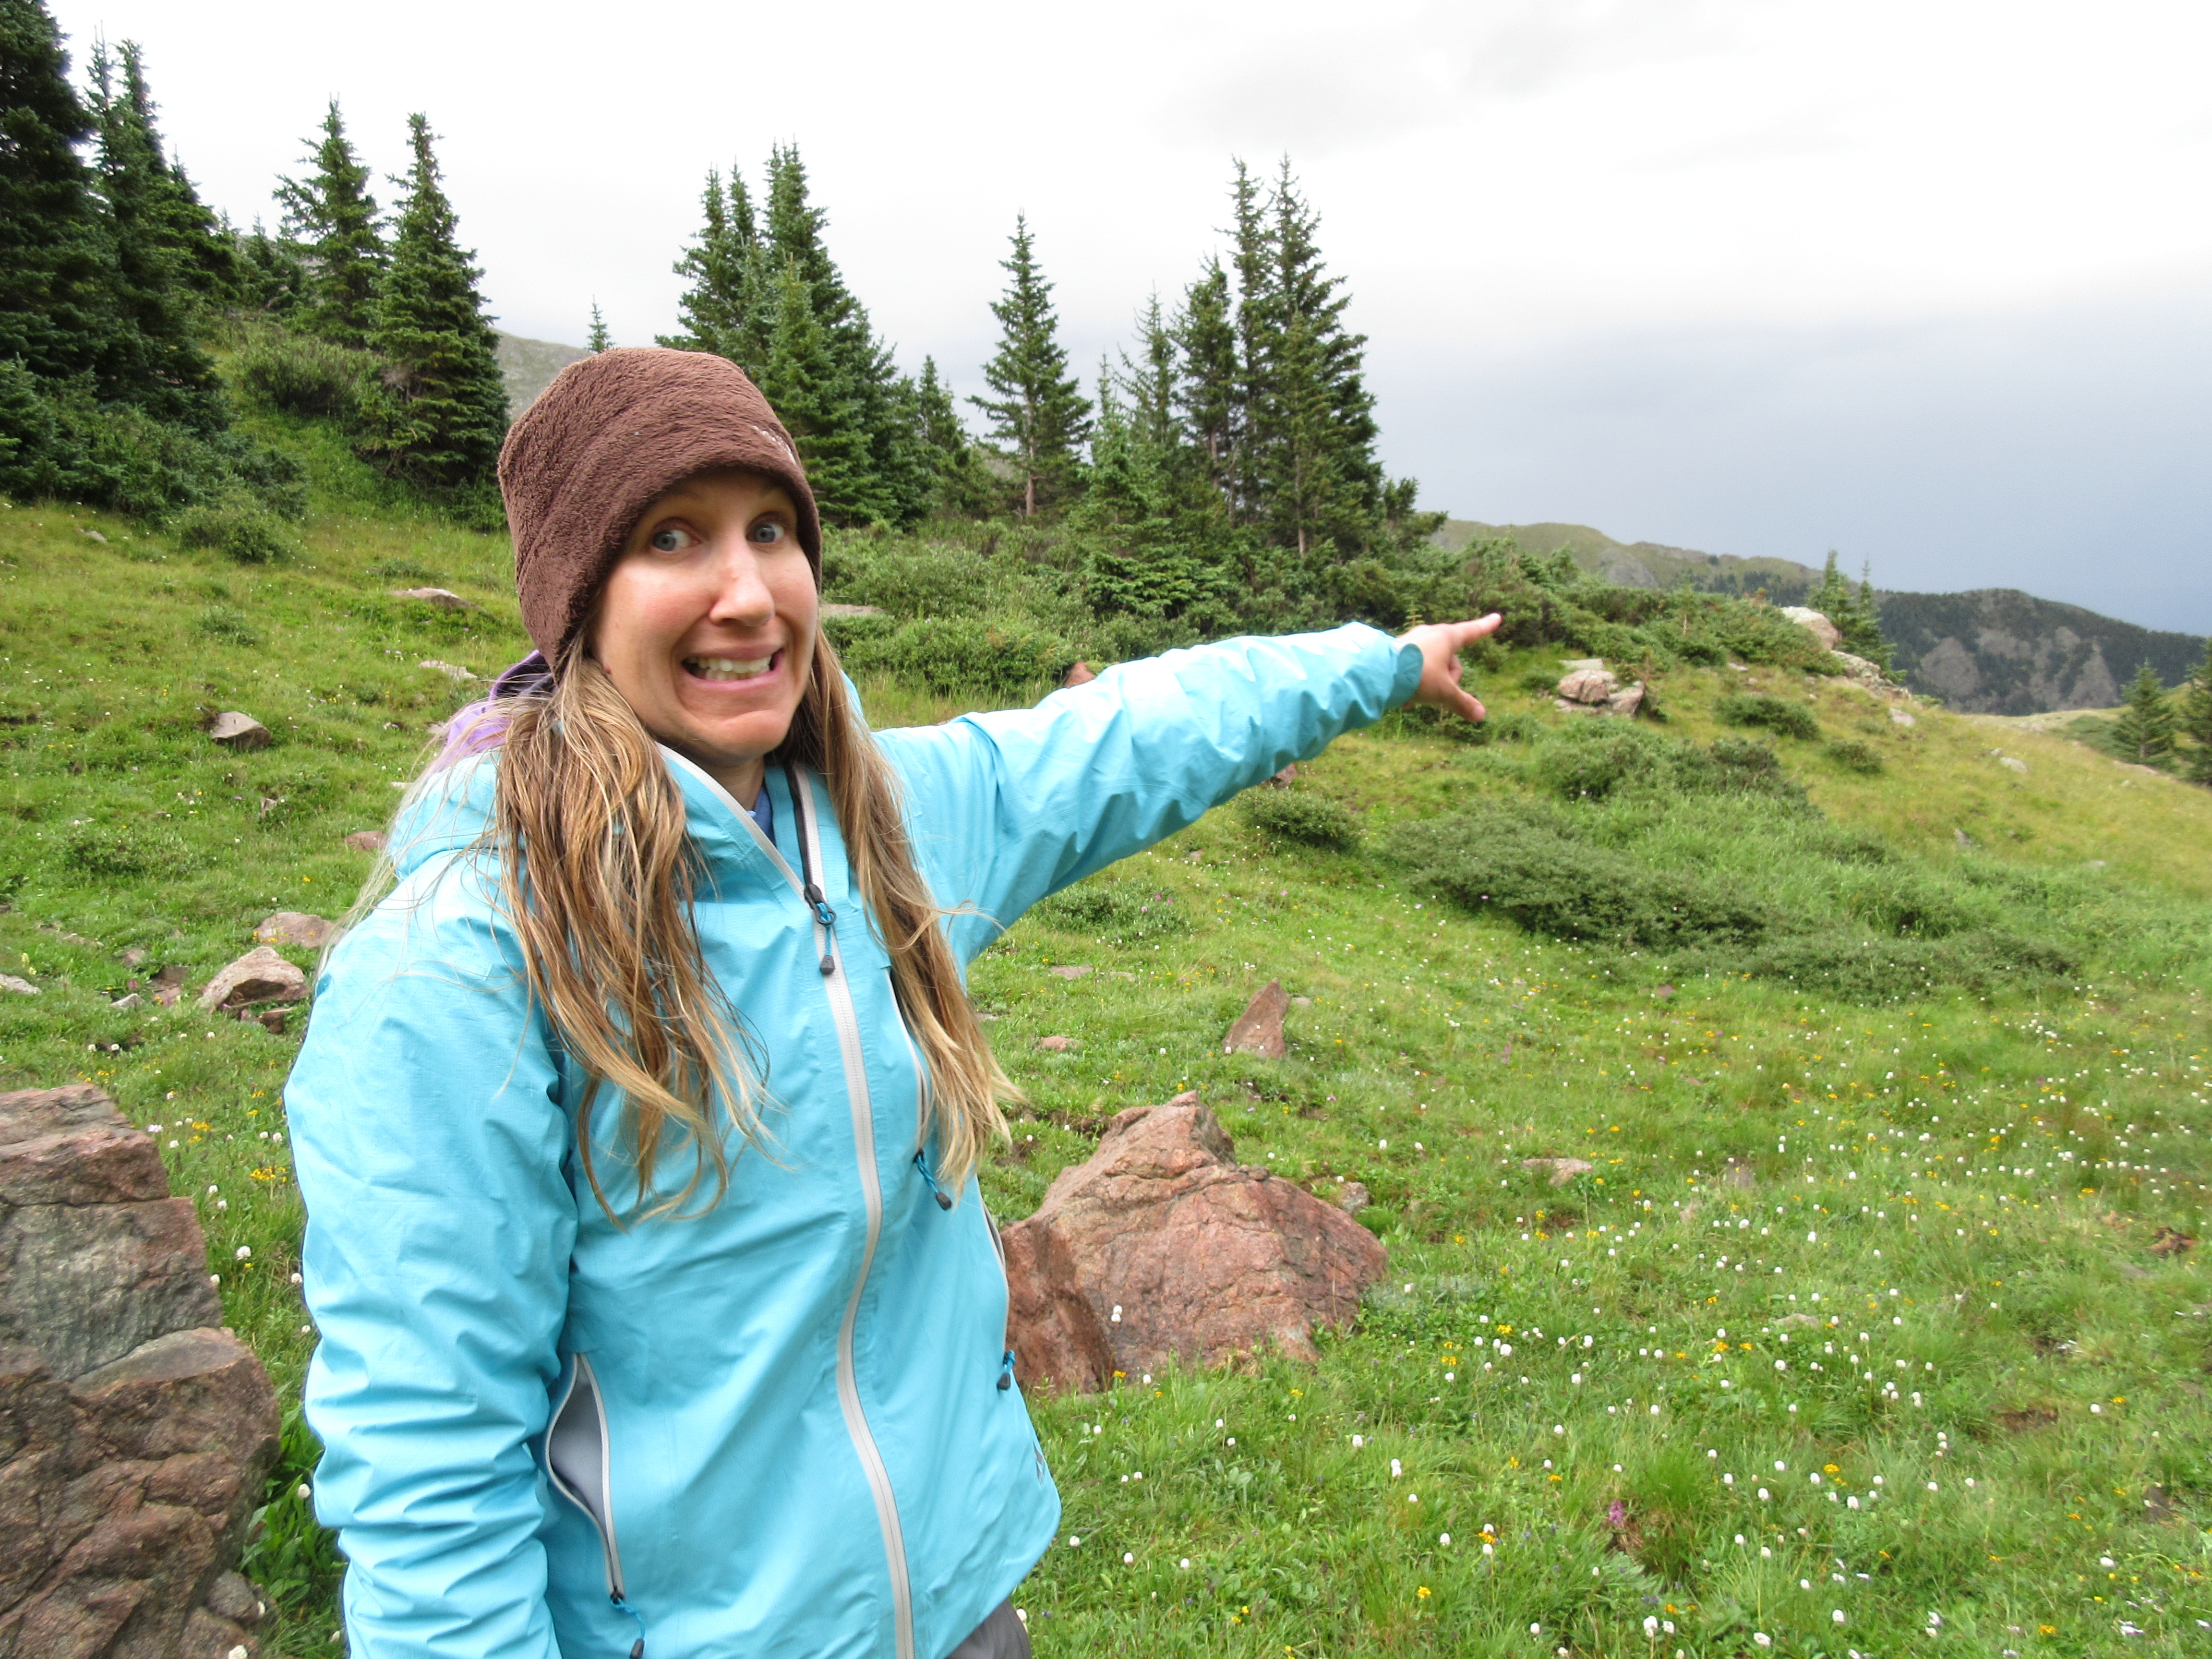
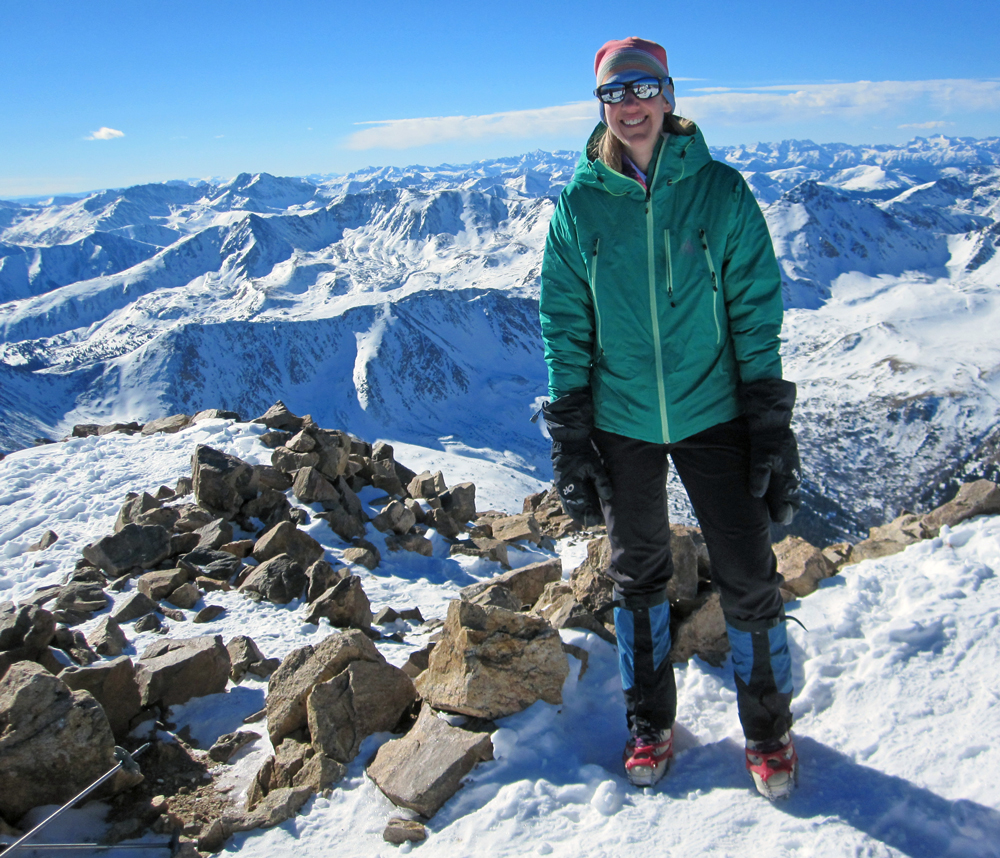
I am going to end this post with a few more photos from our big trip this summer. Happy hiking!

Cube-Rock-Pass-for-web
Only a mile left to camp! I am tired but happy on day two of our trip. This was one of the hardest with 2,700 feet of elevation gain and a heavy pack.
Indian-Basin-for-web
The snow levels in the Wind River Range were 200-300 percent of normal. Areas that would normally be snow-free in August were still frozen.
Map-for-web
Doug does a map check on the way to the North Fork of Bull Lake Creek–one of the most remote areas of the Wind River Range. We prefer a traditional map and compass for route finding.
Blaurock-for-web
Doug surveys the landscape from our campsite along the North Fork of Bull Lake Creek beneath Blaurock Pass. This place is breathtaking and is one of my favorite spots in the Winds.
Hello-for-web
Testing out my new RockPhone. Too bad the reception wasn’t great at our campsite beneath the Knife Point Glacier. 😉
Eclipse-for-web
The Wind River Range was a prime spot for viewing the total eclipse, but we avoided the crowds by taking in the spectacular event from the base of the remote Knife Point Glacier. We even had our very own two-person eclipse-viewing party–complete with special celebratory trail snacks and a goofy commemorative selfie.
Knifepoint-Glacier-for-web
I ascend the Knife Point Glacier after viewing the total eclipse.
Indian-Basin-2-for-web
Is there any place in this range that isn’t spectacular? Here I travel through Indian Basin.
Titcomb-2-for-web
Doug and I have been to the Wind River Range many times, but had never previously explored the popular Titcomb Basin.
Titcomb-for-web.jpg
We are jumping for joy to be in this magnificent Titcomb Basin!
Sunset-Titcomb
The peaks of Titcomb Basin, seen from Island Lake, glow in the evening light.
Winds-flower-backpacking-fo
I stroll through the wildflowers near Clark Lake.
Clark-Lake-for-web
Doug ascends the pass to the Lozier Lakes. Clark Lake is in the background.
Porcupine-Creek-Valley-for-.jpg
Doug soaks in the peace of the Porcupine Creek Valley. We saw more grizzly bears (a mom and two cubs) than people during the two days we spent this less-traveled area of the range.
End-of-the-trail-for-web
Doug and I feel the mixed emotions of reaching the end of the trail: happy to have had an amazing trip but sad that the adventure is over. It is always hard to return to civilization after living a life of simplicity in the mountains.

My favorite products for dealing with ostomy waste in the backcountry

Just one more cast, I thought, as I tossed my line in the still waters of Middle Willow Lake in the Gore Range of Colorado. It was a phrase I had been repeating to myself all morning, and by that time I had completed dozens of “final” casts– almost every one hooking a hungry brookie. I nervously looked at the blackening clouds coming over the ridge but even the threat of a downpour couldn’t stop me from flinging my line in the lake again. Sure enough– a trout grabbed the elk-hair caddis fly. I reeled the fish in, released the hook from its mouth and watched it swim away.

Fly fishing before the storm came in.

Suddenly, a swift downdraft disrupted the glassy surface of the the lake and a crack of thunder smashed the silence of the mountain basin. That really would have to be my last cast of the day.

Doug motioned to me from down the lake shore that he too was ready to call it quits. Hail let loose from the sky and pelted my forehead as I hefted my pack onto my back and fastened the hip belt. That is when I noticed the bulging ostomy pouch on my belly and remembered that I had not emptied it since before breakfast; it was now late afternoon. Oh well. It would have to wait. Doug and I threw on our raincoats and made our way through the forest and back to camp.

When the rain didn’t let up for hours, I cursed not emptying my pouch earlier when the weather was fair. I could have taken my sweet time digging a perfect hole in the perfect location while blanketed in warm sunlight. Instead, I was cold, damp and stuck under our cooking tarp watching the torrential rain form small lakes around our backcounty site. Teeth already chattering from the damp chill, there was no way I was going to take a ten-minute hike into the forest surrounding camp to empty my pouch. Fortunately there was another option: in the tent I had a supply of closed-end pouches on hand. Within a few minutes I had a fresh one popped on and the used one bagged up.

Doug waits out the rain under our cooking tarp.
warming-up
It is very important to color-coordinate your mug and jacket while in the backcountry.

Our backpack in the Gore Range has been just one of many outdoor adventures we have embarked on this summer (which is one of the reasons I have been so absent on this blog!) We also went on two more backpacking trips, including a short trip in the Mt. Massive Wilderness and a rugged nine-day adventure in the Sangre de Cristo Wilderness– all in our home state of Colorado. Early June also included a climb of the First Flatiron in Boulder, CO. Each trip was unique, and I loved having a variety of waste management techniques to pull from. In this post I will highlight my favorite products and techniques for dealing with output during those situations when emptying would be inconvenient or impossible. Some of these methods I have written about before and are tried and true for me. Others are new things I have just recently discovered.

Our first backpacking trip of the summer was a three-day adventure in the Mt. Massive Wilderness in Colorado.
Let’s go that way! The summer of 2015 was filled with three amazing backpacking/ fly fishing trips in our home state of Colorado. Our first one was a was a three-day adventure in the Mt. Massive Wilderness.
Trip number two consisted of a four-day hike into the Willow Lakes area of the Gore Range.
Trip number two consisted of a four-day journey in the Willow Lakes area of the Gore Range.
We ended the season with a 9-day off-trail backpacking and fly fishing adventure in the Sangre de Cristo Wilderness in Colorado.
We ended the season with a nine-day mostly off-trail backpacking trip in the Sangre de Cristo Wilderness.

Closed-end pouches
So often, closed-end pouches are labeled as being designed for colostomies. True, ileostomates tend to have more profuse output which makes swapping out multiple pouches everyday an expensive endeavor.  However, for certain short-term situations, closed-end pouches can be an incredibly useful tool for all people with ostomies.

There is no place to drain a pouch on long rock climbs such as the First Flatiron, which Doug and I made an ascent of in June.
There is no place to drain a pouch on long rock climbs such as the First Flatiron in Boulder, CO, which Doug and I made an ascent of in June.
Swapping out a closed-end pouch on a climb up the FIrst Flatiron this summer was easy.
Fortunately, swapping out a closed-end pouch on a climb is easy– even while tied in with my harness buckled.

I use them on rock climbs, trips near water, snow adventures and any other times when the environment does not allow for digging holes to bury wast. They are easy and mess-free to swap and pack out.  Moreover, lately I have discovered their handiness for nighttime use on backpacking trips.

Though I dig holes and empty 90% of the time while backpacking, overnight emptying has always been a challenge for me. For some reason my digestive system changes when I am doing strenuous activity all-day and I have to empty a lot more at night than I do at home.

In order to minimize my impact on future backpackers, I like to walk a fairly long distance from camp to empty, and I only dig holes in areas where no one would likely set up a campsite in the future. The problem is, places like that are hard to find in pitch blackness. I used to pre-dig a few holes during the day and then make mental notes to find them in the dark, but it was still a challenge to hike to these locations in the middle of the night when I was sleepy. If it was raining, it was even worse. I soon discovered it was a lot safer to stay close to camp and swap out closed-end pouches in the middle of the night. During the day, I would go back to using a drainable pouch.

Hiking into the darkness to find a place to empty my pouch is not my favorite thing to do. I have since started swapping out closed-end pouches at night on wilderness trips so that I don't have to do this.
Hiking into the darkness to find a location to empty my pouch is not my favorite thing to do. I have since started swapping out closed-end pouches at night on wilderness trips so that I don’t have to do this.
It feels great to relax in my sleeping bag knowing I am not going to have to hike off into the dark woods to empty.

Doggie Poo Bags
Managing an ostomy in the wilderness requires packing out used supplies. One of my favorite items to secure used pouches and wafers are simple opaque black doggie-poo bags. They are cheap, non-bulky, and lightweight. Moreover, Ziplock bags can easily un-zip or pop open when jostled. However, doggie poo bags can be tied tightly with an overhand knot. Even when packing out pouches with the the most watery output, I have never had one leak.

LOKSAK OPSAK Odor-proof Barrier Bags
Though doggie-poo or other plastic bags may work well for holding used pouches, they don’t do a good job of containing odors.  Even when I double-bag them in a regular Zip-lock bag, the smell still comes through. One great product for solving this dilemma is OPSAK odor proof barrier bags. They come in two different sizes and are great for holding in odors when you need to pack out full ostomy pouches. They are pricey, so I place all my sealed doggy-poo bags into one OPSAK, empty it into the trash at the trailhead, and then save it for another trip.

My pouch pack-out trifecta: the full pouch goes into a doggy-poo bag, that goes into a Ziplock, a few of those go into a Ziplock and than all of it gets placed into a re-usable OPSAK Odor-proof Bag.
My pouch pack-out trifecta: the full pouch goes into a doggy-poo bag, a few of those go into a Ziplock to contain odors a little bit more, and then those get placed into a re-usable OPSAK Odor-proof Bag.
OPSAK bags come in a large size too for a more extended expedition.

OstoSolutions Ostomy Pouch Disposal Seals
Unfortunately, closed-end pouches that are full of ostomy output are incredibly heavy and take up space in one’s pack. I once weighed my full nighttime pouches on a two-night backpack trip and they collectively weighed three pounds. Multiply that for longer trips and the extra weight becomes quite burdensome.

I was faced with such a dilemma on a nine-day backpacking trip in the Sangre De Cristo range of Colorado in August.  This trip was a particularly strenuous one with difficult off-trail travel over incredibly steep mountain passes. Our packs were heavy due to the amount of food we had to carry and the last thing I wanted to do was add more weight to my pack in the form of closed-end pouches filled with poop. At first I had planned to just go out into the night to empty to save from carrying the extra weight, but every evening at bed time the storms and torrential rains seemed to roll in.

I scramble up a steep gully with a heavy pack on a 9-day off-trail backpacking trip in the Sangre de Cristo Range, Colorado.
I scramble up a steep gully carrying a heavy pack on a nine-day off-trail backpacking trip in the Sangre de Cristo Wilderness, Colorado.
I didn't need the added weight of full used ostomy pouches in my backpack.
Food and supplies for such a long trip were heavy, and I didn’t need the additional weight of full used ostomy pouches in my backpack.

Fortunately, I found a great way to solve this problem by using some OstoSolutions Ostomy Pouch Disposal Seals that I had brought along. In the tent, I would swap out a closed-end pouch as I always had. However, instead of just tossing the full one into a baggie and tying it shut, I would cap it with an OstoSolutions Seal. In the morning, I would take a long hike from camp and dig a cathole in perfect Leave No Trace style. I would then remove the OstoSolutions Seal from the full pouch and dump the contents in the hole. Finally, I would snap the OstoSolutions Seal back on the now-empty pouch and bag it up to be packed out. The weight savings in packing out used (but no longer full) pouches was huge! The OstoSolutions Seals themselves are very light. I found that packing one for each night (plus a few more for those rare nights when I might have to empty twice) was easily doable. The seals would also be handy in alpine areas where digging holes to empty can cause damage to the delicate environment. A full pouch, capped with an OstoSolutions Seal, could be packed out until one got below treeline. There the seal could be snapped off, and the contents of the pouch buried in a much less fragile place.

I can snap an OstoSolution Seal on my pouch at night and then pop it off later to empty the contents into a cathole (a six-inch deep hole dug in the ground.)
I can snap an OstoSolutions Seal on my full pouch at night and then pop it off later to empty the contents into a cathole (a six-inch deep hole dug in the ground.)
Doug and I descended the steep gully below the notch in this photo on day seven of the trip. It was essential to keep our packs as light as possible in such terrain.
Doug and I descended the steep gully below the notch in this photo on day seven of the Sangre de Cristo trip. Keeping our packs as light as possible was essential in such rugged terrain.

Don’t let a fear of being away from a bathroom prevent you from heading into the wilds. With these four supplies (closed-end pouches, doggie poo bags, OPSAK bags, OstoSolutions Seals), you will be ready for storms, darkness, snow, rock, water, a heavy pack or any other challenges that might present themselves in the backcountry. If these supplies end up not working for you, get creative. An ostomy can be managed in even the craziest situations– it is just a matter of experimenting and finding the right tools for the job.

Yep
Stormy weather seemed to follow us on all of our trips this summer! Doug casts a few more times before we hastily return to camp.
Not another storm! Dealing with my ostomy in foul weather was an everyday occurrence on most of my trips this summer.
Yikes! Yet another storm! Dealing with my ostomy in foul weather was an everyday occurrence.
However, the clouds did part enough that I got some glorious backcountry lake swimming in.
However, the clouds did part occasionally, and I was able to get some glorious backcountry swims in. I do not have to make any special modifications to my ostomy system when swimming– it adheres just fine as is.


These goats have nothing to do with ostomies, but I did see them on one of our trips and they are cute.
These goats have nothing to do with ostomies, but I did see them on one of our trips and they were cute.


Marshmallows and paper towel hats: tips for anytime appliance changes

The main room of our condo during a recent vacation with Doug’s parents looked a bit like an outdoor gear store. Snowboards and skis of all sorts lined the wall and a plethora of boots sat in front of the fireplace. Closets, dressers and duffel bags overflowed with Capilene, fleece and Gore-tex clothing. During a week in the mountains near Winter Park, Colorado, we took part in two days of biathlon racing, and one day each of skate skiing, snowboarding and telemark skiing. I also managed to squeeze in some hiking and sketching in my nature journal in Rocky Mountain National Park. With so many activities on the schedule–some of which required an early start–it was hard to know when to fit in my appliance changes.

Our vacation included to days of biathlon racing.
Our vacation included two days of biathlon racing. I would rather change my appliance after dinner and face the biggest volcano of ostomy output than get up at 4 a.m. to change my appliance before a race.
I also put on my telemark skis after not using them for eight years (and then could barely walk for the next week.) I am trying to relearn this skill so I can use my tele skills to get out to some Colorado ski huts next winter. Stay tuned for a post in 2016 about changing your appliance in a communal ski hut.
I also put on my telemark skis after not using them for eight years (and then could barely walk for the next week.) I am trying to relearn this skill so I can use it to take trips to Colorado ski huts next winter. Stay tuned for a post in 2016 about changing your appliance in a communal ski hut.
Since I could barely walk after my day of telemark skiing, I opted to sit down and sketch in my nature journal for one day of the trip.
Since I could barely walk after my day of tele skiing, I opted to sit down and sketch in my nature journal for one day during the trip.
My snowboard was feeling left out, so I took it out for one day on the slopes. My legs were so tired from days of non-stop winter sports, that I completely lost the ability to make my board turn after a few runs. Note to self-- sliding down the entire front side of the Winter Park Resort on your heel edge is not much fun. Best to take a rest day instead.
My snowboard was feeling left out, so I took it out for one day on the slopes. My legs were so tired from days of non-stop winter sports, that I completely lost the ability to make my board turn after a few runs. Note to self– sliding down the entire front side of the Winter Park Resort on your heel edge is not much fun. Best to take a rest day instead.

Unfortunately, appliance changes aren’t that quick for me. Due to pretty acidic ileostomy output, I have to protect my skin with several layers of products. Stoma powder, skin prep, Duoderm, Eakin Seals and paste–I use them all. My changes usually take at least 30 minutes–sometimes longer.  Even when I use all those products, my output chomps through them like a piranha if I try to go longer than three or four days, and I end up with very raw and painful skin.

The the saying "simple is better" does not apply to my appliance changes. I need a lot of layers of products to protect my skin. Putting on all this stuff takes a lot of time and gives my stoma ample chances to expel output everywhere.
The saying “simple is better” does not apply to my appliance changes. I need a lot of layers of products to protect my skin. Putting on all this stuff takes a lot of time and gives my stoma ample chances to expel output everywhere.

Those with an ileostomy know that it can be pretty hard (if not impossible) to find even a short chunk of time when your stoma isn’t pooping. Usually I try to change my appliance in the morning as that is when my stoma is the most quiet. However, on a busy ski vacation (or any time with a full schedule) that plan doesn’t always work. If I already have to wake up at 5 a.m. to make it to a race on time or catch first tracks in powder, it is hard to get up even earlier to fit in an appliance change. Also, I don’t like worrying about when I am eating and how it will impact my appliance swap. If I want to head out to a restaurant for a post-ski meal later in the evening, I go for it even if I know it will be harder to change in the morning due to the extra output. In some cases I will even switch out appliances in the evening right after a big dinner (gulp!) if that is the best way to fit it into my schedule.

If you are wondering if I have a particularly quiet and cooperative stoma, the answer is no. My stoma is a non-stop workhorse and churns out output 24/7.  Fortunately, I have some tricks that allow me to change at any time of the day even when my stoma is active.

Trick number one: Marshmallows
My stoma nurse first let me in on this little secret. If I eat four to six regular-sized marshmallows about 15 minutes before a change, my stoma will usually stop outputting for about 30 minutes–just enough time to finish getting my appliance on.  I can’t make any promises that it will work for you, but I recommend giving it a try. It is the only time you will get to eat marshmallows for health reasons. I have no idea why the very first individual to discover this trick was dining on marshmallows right before changing their appliance, but I sure am thankful for their sweet tooth!

This photo isn't from our winter vacation but does show my love for marshmallows. They are best over a campfire, but I will happily eat them cold before a 5 a.m. appliance change.
This photo isn’t from our winter vacation but does show my love for marshmallows. They are most delicious when toasted over a campfire, but I will happily eat them cold before an early morning appliance change.

Trick number two: Make a hat for your stoma
When I first got my ostomy, I absolutely dreaded changes. They were tear-filled endeavors wrought with frustration because I couldn’t get my barrier ring and wafer on without my stoma pooping all over the place and ruining the adhesives. I turned to the internet for ideas to solve this problem and discovered a post on a forum that suggested wrapping the tip of my stoma with a strip of paper towel. I gave it a try and couldn’t believe how well it worked! Plus I liked that it made my stoma look like it was wearing a cute hat.

Four years later, and I still use this method during every single change. As my stoma chugs out stool, the little hat fills up. When it has reached maximum carrying capacity, I simply pop it off, toss it in the trash can next to me, and wrap on another. Along with collecting output, the stoma hat frees up my hands to put on powder, barrier film, and all the other products that I use to protect my parastomal skin. It also keeps the base of my stoma dry as it absorbs some of the moisture from the mucous membrane.

This little trick allows me to change whenever I need to as it doesn’t matter if my stoma releases output; the hat is always there to catch it. Occasionally, if my output is profuse and watery during a change, the technique doesn’t work as well. However it is better than nothing, and if my output is watery, sometimes gulping down a few extra marshmallows will temporarily slow down the flow until I can finish the change.

I realize that making a hat for a flush stoma won’t work very well, so this trick works best if your ostomy protrudes from your belly a bit.

The only supplies needed for a stoma hat are one-inch-wide strips of paper towel.
JWilbur my stoma models a poo-catching paper towel hat. To make one, simply wind the paper towel strip around the top of our stoma and you are set to go.
My stoma, Wilbur, models a stylish poo-catching paper towel hat. To make one, simply wind the paper towel strip around the top of your stoma and you are set to go.
It is easy to slid your wafer right over the stoma when it is wearing a hat. Note that under the wafer, I have already put on my Eakin ring and other materials.
It is easy to slide your wafer right over the stoma when it is wearing a hat. Note that under the wafer, I have already put on my Eakin ring and other materials. If you are using a one-piece appliance, you can still use the hat method. Just pop the hat off right before you put your appliance over your stoma.
All pouched up with no mess at all. For those who are wondering about the tape job, I love Convatec wafers but the tape irritates my skin. I cut it off and add my own strips of Medipore tape.
All pouched up with no mess at all. For those who are wondering about the tape job, I love Convatec Durahesive wafers, but the tape irritates my skin. I cut it off and add my own strips of  3M Medipore tape. This combo adheres well through showering, swimming, and all sorts of sweat-inducing sports.

If you feel your ostomy controls your life and confines you to a certain schedule, keep searching and experimenting to find solutions. I’d never have guessed that something as simple as marshmallows and paper towel “hats” would give me the freedom to live with my ostomy on my terms rather than the whims of my stoma.

OstoSolutions Ostomy Pouch Disposal Seals: a helpful tool for dealing with ostomy waste outdoors

A couple of summers ago I climbed Devil’s Tower in Wyoming on a 98 degree day. As there was no place to empty up on the rock, I used closed-end pouches and carried the full ones out in my backpack.  As I was rappelling the route upon completion of the climb, I noticed that I could smell ostomy output through my backpack. Oh no! My used ostomy pouches must be leaking out of the plastic bags I put them in, I thought. When I got to the base of the tower,  I opened the lid of my pack with trepidation. However, all was well with my ostomy pouches. They were still nestled securely in three layers of plastic– the final one being an OPSAK odor-proof bag. The heat had simply made things very smelly and no amount of bagging seemed to help. If odor-proof bags couldn’t conceal the smell, I figured nothing could. I accepted that an odoriferous backpack would be my new reality on hot-weather outdoor adventures.

Fortunately, thanks to a new product called OstoSolutions Ostomy Pouch Disposal Seals, my backpack will be smelling a lot fresher. Last fall, a representative from the company contacted me to see if I would give the OstoSolution Seals a try and provide feedback. Though I don’t get paid to promote products, I enjoy trying samples out and letting readers know about supplies that may make managing their ostomy easier. After learning about the OstoSolutions Seals, I was excited to test them out because it seemed like there were many situations where they could be useful for outdoor adventures.

An OstoSolutions Ostomy Pouch Disposal Seal is a lid for the opening of a two-piece ostomy pouch. It snaps on and keeps any odor or output from coming out when a used pouch is thrown away. To insure a tight fit, Ostosolutions Seals are pouch-specific and are available for a wide variety of brands and sizes.

I have an ileostomy and empty my pouch four to eight times a day. Because of this, I usually use drainable pouches and keep one on for three to four days. If I were to use disposable closed-end pouches everyday, I would go through far too many and it would be expensive. However, when I am in places where it is difficult to empty a pouch, for instance on a cliff face or in deep snow, I do use closed-end pouches and pack them out when full. These are the times when I could see the OstoSolutions Seals being practical for me.

The first opportunity I had to try out the seals was while doing volunteer flood-relief work in my home state of Colorado. I was scheduled to help dig out a home in a heavily impacted area and knew there would be no restrooms nearby. I wasn’t comfortable digging a hole to empty and it was difficult to find privacy with 20 other volunteers working at the site. My only option for managing my ostomy waste was to use a closed-end pouch and pack it out. This provided the perfect opportunity to test out one of the OstoSolutions Seals.

After shoveling mud all morning and taking a lunch break, my pouch was finally getting full. I wandered a short distance from the house, ducked behind a tree, discreetly removed my pouch and popped on a fresh one. Then I snapped an OstoSolutions Ostomy Pouch Disposal Seal onto the coupling ring of the full pouch. It was as easy as putting a lid on a food container and completely secure. I did throw the full pouch in Ziplock out of habit, but I wouldn’t have had to. With the seal securely on the pouch, there was absolutely no chance of stool leaking out.

Moving countless buckets of mud as a flood relief volunteer.
We moved countless buckets of mud as flood relief volunteers.
With no restrooms or places to empty my pouch at the site, OstoSolutions made dealing with my waste easy.
With no restrooms or places to empty my pouch at the site, OstoSolutions Seals made dealing with my ostomy waste easy.
OstoSolution Seals simply snap on the pouch's coupling ring for a leak and odor proof seal.
OstoSolutions Seals easily snap on the pouch’s coupling ring for a leak- and odor-proof seal.

I worked for the remainder of the afternoon and used one more seal on a full pouch before finishing up for the day. My husband and I had carpooled to the site with two strangers in their Volkswagen Golf. As we made the hour-long trip back to Boulder, it was comforting to know that no odors would be wafting out of my pack and into the airspace of the small car.

The second test was on a November hike to the top of 14,440 ft. Mt. Elbert in Colorado. I knew it was going to be very cold and windy on the adventure and I hoped that using the OstoSolutions Seals would make swapping out my full pouches faster. I have Raynaud’s disease and when my fingers are exposed to cold temperatures, my circulation becomes impaired. Without blood, they turn waxy white and become prone to frostbite very quickly.

Just 500 feet below the summit, I realized my pouch was getting full. My hiking companions kept going while I dashed behind a boulder to swap out pouches. I quickly lowered my waistband, took off the full pouch and put on a fresh one. After that I snapped an Ostosolutions Seal on the used pouch and tossed it loosely into a stuff sack in my pack.  After a quick dollop of hand sanitizer, my gloves were quickly back on my hands and I was catching up to my friends on the trail. Not having to take the time to close multiple Ziplock bags in the freezing wind saved my fingers. Using OstoSolutions will make swapping out pouches on cold-weather adventures so much easier!

With OstoSolutions Seals, there is not need to double-bag. I simply put the full, closed up pouch in a plastic lined stuff sack.
With OstoSolutions Seals, there is no need to double-bag. I simply put the full, closed up pouch in a plastic-lined stuff sack.
On top of 14,440 ft Mt. Elbert-- the highest peak in Colorado.
On top of 14,440 ft. Mt. Elbert– the highest peak in Colorado.

Though I didn’t get to test out the seals on a hot day like the one on my Devil’s Tower climb, I know that they would be a great tool in these types of conditions. When one disposes of a full pouch in a regular plastic bag, such as a Ziplock, the odors are not contained–especially on warm days. To remedy this I would put all my Ziplocks full of ostomy pouches on a given trip into one large reusable OPSAK brand odor-proof bag. This would work fairly well, but on hot days the OPSAKS never fully contained the odor. Also, the OPSAK bags are expensive, and they would wear out after a while and need to be replaced. With the OstoSolutions Seals, I do not have to worry about using odor-proof bags. Ostomy pouches are already made out of odor-proof materials. By covering the opening with an OstoSolutions Seal, no smells can escape.

On some adventures where it is easy to dig holes in the dirt to empty my pouch into, I use drainable pouches instead of packing out my waste in closed-end ones. However, I may still have to pack out used pouches when I change my whole appliance on multi-day backcountry trips. An OstoSolutions Seal could also be used to snap onto a used drainable pouch awaiting disposal.

The only disadvantage of the seals for me was knowing that I was adding another piece of plastic to the waste stream each time I used one. However, this impact was counteracted by having to toss away far fewer Ziplock bags. The OstoSolutions are also made out of some recycled plastic. I know having an ostomy does result in throwing away a lot of bags, wafers, packaging and other supplies that only have a one-time use. However, these things are necessary for my quality of life without a colon. I choose to focus on all the other important ways I can reduce, reuse and recycle. For instance, I make my own lunches and carry them in re-usable plastic containers, I don’t buy bottled water, I use cloth grocery bags and I recycle every possible thing I can.

Overall, I am very happy with the OstoSolutions Ostomy Pouch Disposal Seals and plan to carry them on my future adventures. With them, used pouch disposal can be fast, discreet and odor-proof.

Check out the OstoSolutions website for more information and special offers.

Another review of the OstoSolutions Seals can be found at http://www.livingbiggerwithcolostomy.com/2014/02/ostosolutions-ostomy-pouch-disposal-seal.html.

How to select ostomy pouch styles for the outdoors

Last weekend I was reminded why I love using closed-end ostomy pouches on hikes and climbs. I was up on a long ridge between between Loveland Pass and Mt. Sniktau in Colorado. Though it was a gorgeous 75-degree day down in Denver, up at 13,000′ it was blustery and frigid. We left the house at 4:15 a.m. so that we would be done with our climb and back to the car before afternoon thunderstorms came in. I emptied my appliance before leaving the house, but by the time we reached the summit of Mt. Sniktau at around 9 a.m., my pouch was reaching its 1/3 full point. This is typically when I like to empty it.

Problem was, no ideal place to empty a pouch could be found on the entire ascent. The wind was howling and shelter was non-existent. On top of this, there were many feet of snow on the ground. The few places where there was exposed earth, it was frozen solid.  There was also no way to go off of the ridge to empty away from the trail. Precarious cornices sat 50 feet to the east of the route and dangerous avalanche slopes could be found 50 feet to the west. Emptying would have meant draining my pouch in the snow close to the area where people travel. Once the snow melted, fecal matter would have been left on top of the ground in a popular area. This was one of those instances when wearing a two-piece ostomy system and using closed-end pouches was almost a necessity.

The ridge between Loveland Pass and Mount Sniktau provided few places to empty a pouch.

If you are just finding out that you will be having an ostomy, or are recently out of surgery you may find the sheer number of ostomy appliance choices to be overwhelming. Closed-end, drainable, one-piece, two-piece — what do all these mean and which ones are best suited for various outdoor adventures? A lot of these choices come down to a matter of personal preference.  The goal of this post is to share some information on the basic types of appliances and explain how I utilize the various options on peaks and trails. I’d also like to hear what you’re using in the outdoors.

First, ostomy appliances come in one- or two-piece options. With a one-piece appliance, the wafer (also sometimes called a skin barrier) is permanently joined to the bag and cannot be separated–you’re literally stuck with this pouch until you remove the whole thing. The benefits of this style is that it has a low profile and sits very flat against the abdomen. The disadvantage is that because the wafer and bag cannot be separated, you lose the flexibility of being able to swap out different types of pouches unless you take the whole system off your belly. I used one-piece drainable pouches for the first five months after surgery, and on one of my very first major outdoor trips as an ostomate: a three-night early spring backpacking excursion. The ground was snow-covered and frozen on this adventure and I ended up trying to drain my pouch into plastic bags so that I could pack out my waste. It didn’t go well and I got output all over my pants and all over the outside of the bag I was trying to drain into. From that point on, I recognized that a two-piece system would be a better option for my outdoor trips.

In a one-piece ostomy system, the wafer is permanently attached to the pouch. Because of this, swapping out different pouch styles on the same wafer is impossible.
In a one-piece ostomy system, the wafer is permanently attached to the pouch. Because of this, swapping out different pouch styles on the same wafer is impossible. Pictured is a Coloplast SenSura X-Pro drainable one-piece appliance.

With a two-piece appliance, the wafer and pouch are separate and attach to each other with a plastic ring that snaps together much like Tupperware. Once the wafer is on your belly, different styles of pouches can be put on or taken off this ring. These systems are a little higher profile because of the plastic ring. However, there is much flexibility in using them because you can swap out different types of pouches depending on your activities. Due to this, a two-piece appliance is my clear choice for outdoor adventures. Also, I find that even with the plastic ring, two-piece ostomy systems are undetectable under my clothing.

There are also choices for the pouch portion of an ostomy appliance; they come in drainable or closed-end versions. Drainables have a tail that unfolds so that output can be emptied out of the bottom. Once the tail of the pouch is wiped clean, it rolls up and closes with either a clip or a Velcro strip until it needs to be emptied again. A person with an ostomy may use the same drainable pouch for multiple days.

Closed-end pouches have no tail. Once they fill up, they are designed to be thrown away full. Due to their simpler design, they cost less per bag than drainable pouches. However, most ileostomates don’t use them the majority of the time. Due to output coming directly out of the small intestine having higher water content, those with ileostomies usually have to empty their pouches six times a day or more. Even though closed-end pouches have a cheaper per-pouch cost, going through so many  in 24 hours makes them impractical and not cost-effective. Generally closed-end pouches are better suited for those with colostomies who may only have to empty a few times a day. That said, there are occasions when closed-end pouches are the perfect tool for those with ileostomies too.

With a two-piece system, the pouches can be separated from the wafer. On the right is a drainable pouch and on the left a closed-end one.
With a two-piece system, the pouches can be separated from the wafer and swapped out. On the left is a drainable pouch and on the right is a closed-end one. Pictured clockwise is a Convatec Sur-fit Natura drainable pouch with an Invisiclose tail, a closed-end pouch, and a Durahesive cut-to-fit wafer.

Drainable pouches are my preference most of the time, even on wilderness adventures, as long as I can find a good place to empty. Packing out full closed-end pouches can be heavy due to the high water content of ileostomy output. In fact, I once weighed the trash bag that contained a day’s worth of full closed-end pouches after an all-day climb and it came in at 3.5 pounds! Multiply that for trips that may be several days long and you can see why I use closed-end pouches only when necessary.

However, my hike on the ridge is an example of an ideal time to use a closed-end pouch. I also like using closed-end pouches in other places where it is impossible to empty: on cliff faces when climbing, on rocky peaks where it is impossible to dig a cathole, and on crowded urban trails. Though I haven’t been on a river trip with my ostomy yet, I can also see them being very useful in these situations when one cannot get far enough from a water source to empty. Also, it takes longer to dig a hole in the ground and properly drain my pouch when in the wilderness than to swap out a pouch. There have been a few times when I have been caught in storms and have decided to swap to a closed-end pouch instead of draining in order to minimize my exposure to lightning, high winds, cold rain or other dangerous elements.  Both drainable and closed-end options also come in smaller sizes if one wants a tinier pouch for some activities such as swimming.

It is also worth mentioning that there is one other style of two-piece ostomy appliances; they are called adhesive coupling systems. Instead of having a plastic Tupperware-like ring like traditional two-pieces, the wafer has a smooth plastic area and the pouch affixes to this with a sticky adhesive ring. The benefit of these is that, without a plastic ring, they are very flat on the belly. You can still swap out pouch styles by peeling off the old bag from the wafer and sticking on a new one. However, I find that adhesive coupling appliances don’t work well on my outdoor trips . When I peel off the full pouch, a little output inevitably gets on the place where I am supposed to affix a clean one. I then have to fully clean this in order to get the fresh pouch to stick. It ends up being too messy and hard to deal with in the wilderness where there is no water to clean up with. I find it much easier to use the traditional two-piece appliances with plastic rings. Even if a small bit of output gets on the ring, it still snaps together fine and is not messy at all.

In adhesive coupling two-piece systems, the wafers and pouches stick together with an sticky ring. They are low profile, but I find them messy to swap out when on outdoor trips.
In adhesive coupling two-piece systems, the wafers and pouches adhere together with an sticky ring. They are wonderfully low profile, but I find them messy to swap out when on outdoor trips. Pictured on the left is a Convatec Esteem Synergy adhesive coupling system and on the right is a Coloplast SenSura Flex wafer and pouch.

A downside of closed-end pouches is that they are a disposable item. I try to make the best environmental choices possible in my daily activities, so I do sometimes cringe when I throw away my bag of closed-end pouches after a climb knowing I have added more to the landfill than I would have if I would have stuck to a drainable that day. I try to remind myself that I do this for a medical reason and to deal with a basic life process of bodily waste removal. In other aspects of my life, I try my best to be gentle on the earth. I take reusable bags to the store, drive a fuel-efficient vehicle, use public transit, buy organic produce to protect wildlife from pesticides, use eco-cleaners to keep toxins out of our water supply, recycle every item possible, and make wise purchases. I hope that, in the grand scheme of things, the impact of the pouches that I throw away is small. I really do only try to use them when absolutely necessary.

When I was on Mount Sniktau on Sunday and decided draining wouldn’t be possible, I even began to wonder if I could find a good place to take off my full pouch and put an empty closed-end one on. It was so windy and there were people everywhere on the ridge. Once my pouch was 1/3 full, I couldn’t find a place to make the switch. I decided I would wait until later to deal with it. The good thing about my ostomy is that, unless I eat something that irritates my stomach and gives me pure liquid output, I have plenty of time to get around to emptying. It is rarely urgent.

On the summit of Sniktau. It was really cold and windy up there with very little shelter.

As I made my way down the ridge from the summit, more and more people were coming up and I realized I couldn’t be fussy with my site selection for swapping. My pouch was now 1/2 full and I needed to take care of it soon. I ran ahead of Doug and his dad but also saw that some people were heading towards me.  I had about 5 minutes before they reached me so I tossed my pack to the side of the trail next to a small pile of rocks and tried to create a wind break. I then dug my supplies out and tied a small doggie poo bag to my pack strap so it wouldn’t blow away (this is what I would throw the full pouch into). Next I pulled down the front of my pant waistband, took my hernia prevention belt off, and quickly swapped out the full pouch for the clean one. Just as I had gotten my clothing back into place and was bagging up my trash, the two hikers approached me. I said hello and we talked for a second about the route. They clearly had no idea I had just dealt with my ostomy. To them, from a distance it probably looked like I was futzing around with my clothing or backpack. One can very discreetly manage their ostomy on the trail with a two-piece system and closed-end pouches.

With all the options out there, it pays to experiment with all the different brands and styles. Don’t feel like you have to use only one type of appliance. Have a dressy occasion where you definitely don’t want your appliance to show? Wear a sleek one-piece that week. Hanging out at the beach all day? Go for a mini drainable pouch that won’t hang out beyond the bottom of your suit. And if, like me, you find yourself needing to empty on a wind-swept ridge with sheer drop-offs on both sides — a two-piece with a closed-end pouch may be just the ticket. Take advantage of all the products out there to make life with your ostomy the best it can be.

This is the spot where I swapped out my pouch. By the time Doug caught up and snapped this photo, I was finished managing my ostomy and was changing my camera battery. However, from a distance swapping out a pouch doesn't look much different than this. It can be done very discreetly.
This is the spot along the trail where I switched out my pouch. By the time Doug caught up and snapped this photo, I was already finished managing my ostomy and was changing my camera battery. However, from a distance, swapping out a pouch doesn’t look much different than this. It can be done very discreetly.

Using Duoderm to protect peristomal skin

What’s a mountain girl to write about when my hip injury is keeping me from the slopes and summits? Skin care, of course! After all, taking care of your peristomal skin is of utmost importance. It is hard to enjoy outdoor sports if your skin is irritated and painful or if your appliance won’t stick to weepy, damaged areas.

My stoma is fairly long at 1.5″and doesn’t have the best posture. It flops downward and a bit to the right — especially under the weight of my clothing and pouch. This actually  works great because my output goes toward the bottom of my pouch which helps prevent leaks. On the downside, the area of skin just under my stoma sometimes gets irritated because stool tends to collect in that spot. Also, as my stoma flops down, it compresses my Eakin barrier ring in that area and causes it to erode more quickly. Fortunately, I discovered a great solution to this problem soon after surgery thanks to the help of my home health nurse.

When I don't protect the skin underneath the area where my stoma flops over, I get a strip of irritation.
When I don’t protect the skin underneath the area where my stoma flops over, I get a strip of irritation.

There was a six-week time period after my surgery during which I had a complication with my mid-line abdominal incision (due to a rare reaction to sutures). I ended up having to leave the wound open for healing with the help of a wound vac. While this was certainly a disappointment at the time, the situation also held a hidden blessing. Every other day, a home health nurse would come and change the sponge dressing for my wound vac. In order to do this, my ostomy wafer had to be removed and replaced each time. Along with being a wound vac guru, my home health nurse also had a great knowledge of ostomy skin care. Having the nurse watch and help me change my appliance so frequently over a period of many weeks provided an amazing opportunity to practice the task and troubleshoot problems. As time progressed, my nurse saw that a sliver of skin under my stoma was consistently raw.  She told me that this would likely become a chronic issue unless I did something to better protect that section of skin. I was already using Eakin barrier rings, so she suggested I add a product called Duoderm Signal to my ostomy system.

Duoderm Signal comes in a 4″ x 4″ sheet and custom-sized pieces can be cut out of it to cover whatever area needs protection. To care for the sliver of skin right under my stoma, I cut a 1/2″ by  1″ comma-shaped piece that contours with the edge of my stoma. When I place it on my skin in the trouble spot, it provides a much needed extra layer of protection. When my Eakin barrier ring erodes a little sooner in that section, my output touches the Duoderm layer instead of my skin.

Duoderm can be placed right on the skin, but it does not adhere well if the area is wet. Therefore, if I get irritation that is weepy,  I must put a layer of stoma powder and skin prep under the Duoderm in order for it to stick. The best way to do this is to use the “crusting” method. First I put a small bit of powder on the sliver of skin that is irritated. I then dab it with 3M Cavillon Skin Prep. Once it dries, I add one more layer of stoma powder and one more layer of Cavillon. I give the area a final dry with a hair dryer on a low setting for a few seconds. Then, I add the strip of Duoderm over the crusted area. Finally, I put my Eakin barrier ring over the Duoderm followed by my wafer.

This method works wonderfully to protect the skin under my stoma. However, I can’t stretch wafer changes longer than four days when using the Duoderm. If I do, the Duoderm will start to peel up from being so close to my wet stoma. Then output starts to seep under it and cause skin breakdown.

If I develop a sore under my stoma, I put a layer of stoma powder just on the tiny sliver of irritated skin. I then dab the powder with Cavilllon skin prep to form a seal over it. Once dry, I add one more layer of stoma powder followed by one more layer of Cavillon skin prep. This forms a "crust" over the sore that the Duoderm can stick to. The stoma powder also helps heal the sore.
If I develop a sore under my stoma, I put a layer of stoma powder just on the tiny sliver of irritated skin. I then dab the powder with Cavilllon skin prep to form a seal over it. Once dry, I add one more layer of stoma powder followed by one more layer of Cavillon skin prep. This forms a “crust” over the sore that the Duoderm can stick to. The stoma powder also helps heal the sore.
A small piece of Duoderm Signal adds another layer of protection for my skin. I put the Duoderm under my Eakin barrier ring. Both of these things then go under my wafer.
A small piece of Duoderm Signal adds another layer of protection for my skin. I place it right on top of the stoma powder/Cavillon skin prep “crust” in the photo above. If I happen to not have a weepy sore and just want to protect the skin, I skip the powder and Cavillon step and place the Duoderm right on my skin.
I place my Eakin barrier ring over the Duoderm. You can see the Duoderm peeking out in this photo.
I place my Eakin barrier ring over the Duoderm. You can see the Duoderm peeking out towards the bottom of the ring in this photo.
The Duoderm and Eakin barrier ring protect the trouble spot beautifully and help me maintain healthy paristomal skin. As long as I put the Duoderm on at every change, I rarely get a sore anymore unless some output happens to seep under the Duoderm. In these cases, the layer of stoma powder and Cavillon mentioned above clears it up by the my next change.
The Duoderm and Eakin barrier ring protect the trouble spot beautifully and help me maintain healthy peristomal skin. As long as I put the Duoderm on at every change, I rarely get a sore anymore unless some output happens to seep under the Duoderm. In these cases, the layers of stoma powder and Cavillon mentioned above clear it up by my next change.

Some people with ostomies are lucky enough to be able to stick their wafer right to their skin with no additional products. Unfortunately, that does not work for me. I need to build up several layers of things in order to maintain healthy skin. As soon as I try going back to more simple methods, my skin suffers. Appliance changes typically take me over 45 minutes if I include the time it takes to set up my materials, remove my old appliance, shower and do all the steps to get my new wafer on well. I never worry about it. It is not a race. Having my appliance off for a little while actually helps my skin get some fresh air. Between eating about five marshmallow prior to my change to slow down my output, and then wrapping paper towel strips around my stoma to catch any stool that might come out as I work, things go fairly smoothly when having my appliance off for that long. Of course there are always those days when my stoma doesn’t cooperate! Still, even with the occasional mishap, taking the extra time needed to better protect the skin around my stoma is worth it. Having happy skin helps me feel good about my ostomy and gives me confidence that my appliance will adhere well through all my adventures.

I do have one more skin care tip that I use which involves using both an Eakin ring and stoma paste, but that will have to wait for a future post!

The Phoenix magazine now available online

Beyond great doctors and following the treatment plans they prescribe, one of the things I find most important when dealing with difficult medical conditions is maintaining a sense of hope.  I simply have to be able to believe that the possibility of a good outcome exists, even if I know the road to get there might not be easy or certain. When I was facing ostomy surgery, one of my biggest sources of hope was The Phoenix magazine, the official publication of the nonprofit United Ostomy Associations of America. The minute I stumbled upon it online, I subscribed and bought all the back issues. I eagerly read every word of every issue. Along with a vast array of educational articles about products and managing an ostomy, there were countless inspirational stories about people with ostomies who were out there living life to the fullest. I learned about a woman who had hiked the Appalachian Trail and another who had visited China. I found out about a climbing guide in Alaska who had an ostomy and another individual who had climbed Everest. Reading about these people was as important as figuring out how to get my wafer to stick: they allowed me to visualize what my life could be like in the future. They gave me hope.

Last fall, I began contributing to The Phoenix myself by wring the quarterly Ostomy Outdoors column. This is certainly something I never would have visualized as being part of my future while lying in my hospital bed a couple of years ago! Life is full of beautiful surprises and being able to help people through the same magazine that provided so much inspiration for me is humbling.

Whether you are facing surgery, just recovering, or a seasoned ostomate, each issue is full of great articles on supplies, skin care, stories about others who have had ostomy surgery and so many other topics. And now it is even easier to view the publication! The UOAA is offering an online subscription for only $19.95. Find out more information and get a free preview of the online winter issue at the following link.

And speaking of hope — I hope to never let a season go by where The Phoenix doesn’t show up in my mailbox. It is such an invaluable resource for me.

Phoenix-post-web-version
The Phoenix magazine is as important as wafers, pouches and barrier rings when it comes to my life with an ostomy.

Ring around the stoma: my best defense against leaks

In approaching the two-year anniversary of my ostomy surgery, I was looking back at an email I wrote to Doug from the hospital during my final severe UC flare. A few days before writing it, I had received my very first infusion of Remicade. It had worked wonders to get my symptoms under control, but I did not want to take such a potent drug for the rest of my life if it could be avoided. I was strongly leaning towards pursuing surgery once I got out of the hospital and wasn’t so sick and weak (a decision that became much clearer when side effects of the drug became more than I could bear). Even though I was quite confident that I wanted surgery, I was still scared of getting an ostomy due to the horror stories I read on the internet–especially the ones that revolved around leaks. I had just read a worrisome tale on the web when I sent this message:

October 2, 2010

Doug,

This all sounds so complicated and overwhelming. I DON’T want to be infused with drugs the rest of my life but this sounds so hard too. What if I can’t find a way to go climbing or backpacking without creating a leaky poopy mess? Are you confident we will be able to figure this all out together without getting fed up? Maybe it feels different when someone faces surgery in an absolute emergency, but I am choosing this aren’t I? Need some reassurance.

-Heidi

Despite the fears, I knew in my heart that surgery was the route I wanted to take to treat my ulcerative colitis. I met with my surgeon and was then scheduled to meet with my “wound, osotmy and continence nurse” (WOCN). I had lots of questions for her, including several about leaks. She assured me that once I found the products that worked for me, leaks should not be an issue. I liked that answer, but I wasn’t sure I believed it. From all the things I read, leaks just seemed like a given with an ostomy. After my surgery, I stocked my car with spare pants, put waterproof pads on the bed when I slept, and bought a collapsible wash basin to wash potentially poopy clothes on future backpacking trips.

It didn’t take long to experience my first leak. Shortly after I got home from the hospital, wound drainage got under my wafer while I was sleeping and broke down the adhesive. Though not a huge disaster, a little bit of stool did escape. I had been using a strip paste right around the opening, but it did not adhere to my skin well. I decided to set up an appointment with my WOCN to see if she could troubleshoot my problem. After hearing about what happened, she left the room and came back with something that looked like a flat donut made out of Silly Putty. It was called a barrier ring. She showed me how to put it on, gave me a few extras, and told me how to order more. I left the office hoping for the best.

So how long was it until the next leak? It has been almost two years since that appointment and I have yet to get another one. My nurse was absolutely right when she said finding the right products is crucial. For me, a barrier ring was all I needed to become confident that output would not seep out from under my wafer. Whenever people mention leaks, the first thing I ask them is if they have tried a barrier ring.

Barrier rings come in many different brands. The first one I tried was an Adapt Ring by Hollister. I used these for four months and liked them a lot. However, I later tried an Eakin Cohesive Seal by Convatec and found that they were more resistant to erosion from my output and stuck to my skin very well–almost melting onto it. Some people don’t like this because the residue is hard to remove. However, that stickiness is exactly what makes them work so well for me; nothing gets beyond the Eakin. I also tried a ring by Coloplast, but so far, the Eakin Cohesive Seals are my personal favorite. Everyone is different, so it pays to try every brand to see which is the best fit for you.

The other thing I love about barrier rings is how well they protect my skin. Wilbur, my stoma, is an active guy. He wiggles, dances and expands and contracts a lot. To leave room my stoma’s gymnastic routines, I cannot cut my wafer too close to it and need to leave about 1/8 inch of my skin exposed. A barrier ring swells up to fill in this space. At first I was a little shocked by how much the barrier ring turtlenecked around my stoma when it was exposed to moisture, but I soon realized that this is exactly what they are designed to do in order to protect the parastomal skin.

The following photos show my favorite way of attaching a barrier ring. This method minimizes the chances of getting the ring wet which allows it to stick to the skin very well. Along with using a barrier ring, I change my appliance every 3-4 days. Beyond that time frame, my Eakin Cohesive Seals erode and leave my skin exposed.

The barrier ring I use: the Eakin Cohesive Seal.
First, I stretch the hole in the ring to match the size of my stoma. Then I tear one side. (Yes, it appears a manicure might be in order… rock climbing is hard on the fingertips).
After drying off  my skin very well, I hook the ring around my stoma.
I then press the torn edge back together.
Finally, I place the wafer over the barrier ring. You can see the 1/8″ space around my stoma and how the ring fills it in. Within an hour, moisture will cause the ring to swell and turtlneck up the side of the stoma about 1/4″. This keeps output from seeping under my wafer while also protecting my parastomal skin. (See the Skin Sleuthing post to read about the taping method pictured).

Nowadays, the spare pants sit unused in the car (well except for the one time they came to the rescue when I dropped my tail and spilled output all over my trousers), the package of waterproof pads is gathering dust in the closet, and I have not had to do laundry on any backpacking trip. It doesn’t matter whether I am climbing in 95-degree temperatures, snowboarding in the frigid cold or swimming at the pool. I always feel confident that my appliance will not leak during any of my activities when I use a barrier ring. Even in the rare instances when my wafer has peeled up, my barrier ring has always held tight and maintained the seal.

So if you are having leaks and haven’t tried a barrier ring, I highly recommend getting a sample and giving it a go. If the ring doesn’t prevent your leaks, meet with a WOCN and see if they have any other recommendations. Talk with other people with ostomies on the internet or at local ostomy support groups and find out what they suggest. With the right products, leaks with an ostomy shouldn’t be a given; they should be the exception.

Skin sleuthing

No more itchy-scratchy. I recently healed a rash under my wafer that had been plaguing me for about four months. In the process, I discovered that figuring out the cause and solution to ostomy skin problems can take some serious detective work. Solving my stubborn case involved some help from my stoma nurse, medication, a wacky new wafer method, and a touch of inspiration from a childhood memory.

I grew up with two brothers, and sometimes we would get into spats. When these unfortunate events happened, I could handle hair pulling, pinching, being kicked and even getting spit at. However, there was one method of sibling warfare that I absolutely dreaded: the snake bite. This involved having my forearm gripped with two hands while the skin was twisted in opposite directions at the same time until a painful sting ensued. A well-executed snake bite would leave my arm red and throbbing.

On several occasions since getting my ostomy surgery, I was certain that my wafers were giving me snake bites.

When I was healing up from surgery and researching ostomy appliances and sports, I read that some people have trouble with their wafers sticking in warm weather due to sweating. As I got back into outdoor activities, I fully expected that this would be the main wafer issue I would have to deal with when doing active sports. However, this ended up not being the case at all; my wafers adhered well through any activity. Instead, I was faced with an entirely different problem related to my ostomy appliance and strenuous sports.

When I was hanging out at home in the months after surgery, I had absolutely no issues with my wafers causing any skin issues. However, once I healed up I started biking and hiking, it seemed like my wafer would get pulled in one direction as I moved, while the skin underneath wanted to move in another. The Coloplast wafers I wore for the initial months after surgery were made out of a fairly non-pliable plastic, and would leave a circle of painful blisters on my skin right around the outer edge of  the wafer from this tension. I decided to experiment with a different brand.

I tried Hollister and then Convatec and found that the Convatec ones seemed to move the best with my body contours and movements. I had no further skin issues with my wafers for the first 10 months when I was mainly hiking, snowboarding and biking. Then in January, I started to do activities with more extreme movements, like yoga and climbing, on a weekly basis. All of a sudden, my wafers felt like they were giving me snake bites again–especially near my hip bone.

I have a narrow body, but my stoma measures 1.5 inches at its widest spot. This forces me to use larger sized wafers. When I put a wafer on, it extends past my midline incision scar on one side, and over my hip bone on the other. As I would do high steps while climbing, and twists and bends in yoga, my wafer would pull at my skin at the top of my belly and also near my hip bone. At first I tried protecting my skin with various brands of skin prep, but none made any difference. I tried to stand up while putting on my wafers and made sure I wasn’t pulling the tape part too tight while placing it on my skin. Neither of these things helped. As I was experimenting, I soon realized I had a bigger problem: a very itchy rash began to develop under the tape in the location where my skin had been pulled. Over a matter of weeks, the rash spread to other areas under the hip-bone-side of my wafer.

It was time to seek some help from my stoma nurse. After hearing about my symptoms, she felt it could be a yeast infection and recommended anti-fungal powder. I tried this for three weeks with no improvement.

In the meantime, I started to wonder if perhaps I had developed an allergic reaction to the tape part of my wafers. I really hoped this wasn’t the case. I didn’t want to have to change my ostomy system. I loved the way my wafers stuck so well through sports and swimming, and all my hernia belts and pouch covers were designed to work with my system. I thought an allergy was unlikely though, since there was no rash under the entire left-hand side of the wafer. If I had an allergy to the tape, I assumed it would show up under the entire tape part. Just to rule it out though,  I decided to try Convatec’s tapeless wafers for a couple of weeks. My skin did not clear up and continued to get worse.

It was around this time that I recalled another memory. Several years ago, long before my ostomy surgery, I had a nasty, itchy rash that started on my knee and soon spread to my arms and legs. I went to a dermatologist and was diagnosed with bacterial folliculitis. The doctor felt that I had probably nicked my leg shaving and had some hair follicles get infected which eventually spread to follicles on other areas of my body. It took a while, but it finally cleared up with antibiotics.

The rash I was dealing with under my wafer looked exactly like that rash. To top it off, I now had a little area of rash on my stomach far away from my wafer. My stoma nurse recommended that I talk to my doctor to get a prescription for antibiotics. My doctor agreed that it looked like folliculitis, and I began to take Keflex. Within a week of starting the antibiotics, the rash that I had been dealing with for several months completely disappeared. Finally the mystery had been solved! I deduced that the pulling of my skin under the tape had damaged it and allowed a bacterial infection to set in. Without the Keflex, I am positive my rash would not have gone away.

The problem was, I soon felt the familiar sting of my skin being pulled under the tape when I would bend. I knew I had to change the way I was doing things, or my skin would be damaged again and the whole cycle would start over.

To attempt to solve the problem, I tried something a bit unusual. I continued to use my regular Convatec wafers, but cut off all the tape on the right half. The inner circle of Durahesive material seemed to stick just fine without the tape part, but I reinforced it with little strips of 3M Medipore tape in a few strategic spots for added confidence. My skin has always liked Medipore tape, and it is very stretchy so the strips did not place tension on my skin. When I was done, my new tape and wafer method looked a bit like the sun with rays of tape sticking out.  I nicknamed it the “sunburst method.” I have now been using this method for two months and it has been working great. My skin is super happy with no more tape snake-bites and no more rash! It has held on perfectly through rock climbing, running a 10k, swimming, and even a recent three-day backpacking trip in warm weather.

This photo shows my new “sunburst method” for attaching my wafer. I trim the manufacturer’s tape away on the hip bone side of my wafer and replace it with strips of 3M Medipore tape. You can see the shine mark where my hip bone is. This new taping system completely avoids this area and my skin is no longer irritated under tape when I climb, do yoga or take part in other sports with a lot of stretching and bending movements.
Two months after starting this new taping method and my skin is still healed and happy. Unfortunately, I never took a photo of the rash. Picture hundreds of tiny red raised bumps under where the wafer tape would have been on the left side and you will get the idea.

From eating to product selection to skin care–when you first get an ostomy, everyone tells you that your situation is going to be unique and that you will have to experiment to figure out what works for you. I am only now beginning to realize how unbelievably true this. I wouldn’t be surprised if my sunburst-wafer method was a disaster for someone else even though it worked for me. The point is, make sure to try different things. Don’t settle for supplies and methods that aren’t working well for your individual needs. Keep sleuthing and find the solutions that make living with your one-of-a-kind body and ostomy comfortable.

When I was a kid I didn’t like snake bites, but I did like Nancy Drew books. Nancy would just finish solving some tough case when a new and interesting one would come her way. I have felt a bit like her lately. Now that I have solved the mystery of the itchy rash, what case is next? Last weekend while changing my appliance on the backpacking trip I just mentioned, I noticed a 1/4″ white ulcer-like depression on the side of my stoma about 1/2″ from its base. It looks just like a canker sore. My surgeon and stoma nurse both think it is trauma related, so I am experimenting with cutting my wafer differently to see if it helps. Hmmm–s0 far I haven’t noticed much of a change, but maybe if I try…..

Let the sleuthing fun begin!