On Heavy Backpacks and Hernia Belts

It has been a long time since I’ve posted on the OstomyOutdoors.com. Just because I have been quiet doesn’t mean life has been void of adventures. In fact, the reality has been quite the opposite. This has been an incredible year full of many wonderful trips in the wilds. In fact, Doug and I spent the most nights backpacking in the wilderness together this year than we have at any other point in our lives. A total of 25 nights were spent in the backcountry.

The biggest of these trips was a 16-day, 90-mile-long backpack in the Wind River Range of Wyoming in August. What made this trip unique is that it was unsupported; we carried all of our food and fuel with no resupply along the way. This led to us both carrying very heavy loads: our packs on the first day of the trip were over 70 pounds.

Entering-the-wilderness-for
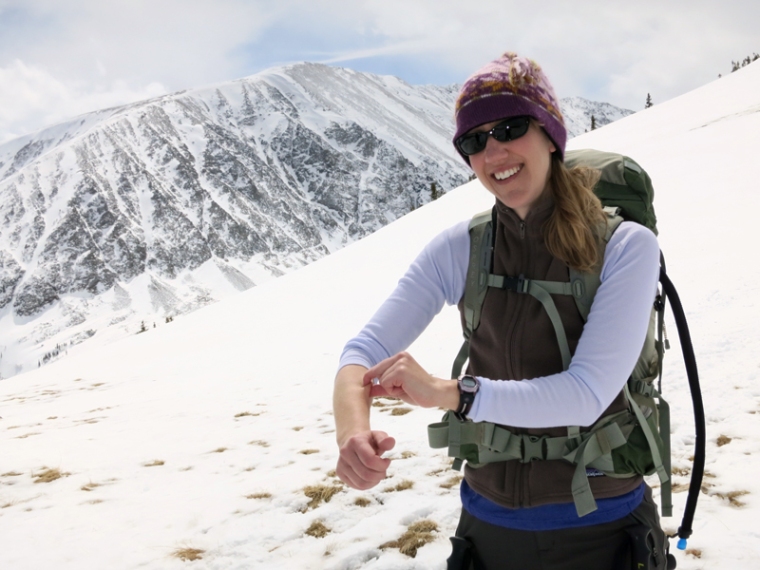
I head out on day one of our 16-day trip with my 70-pound pack. Famous Squaretop Mountain is in the background.
Into-the-mtns-for-web
Only 11 miles to go until camp! I made it, but it was a tough day.

Yes, that is an unusually heavy pack. However, depending on the season, my typical pack weight is still anywhere from 35-55 pounds on mountain trips that are over three days. I am sure all my ultralight backpacking friends are cringing!

Though I have incorporated lightweight gear and packing strategies into my backpacking system, an extreme sensitivity to cold (I am wearing a hat and down jacket in my 68-degree home as I type this) means I must bring a higher-than-average amount of insulating clothing and a very warm down sleeping bag–even in the summer season. I also have Raynaud’s Disease which limits blood flow to my extremities when I am chilled. My fingers and toes become waxy-white and numb and are at an increased risk for cold injury such as frostbite.

Packing-up-for-web
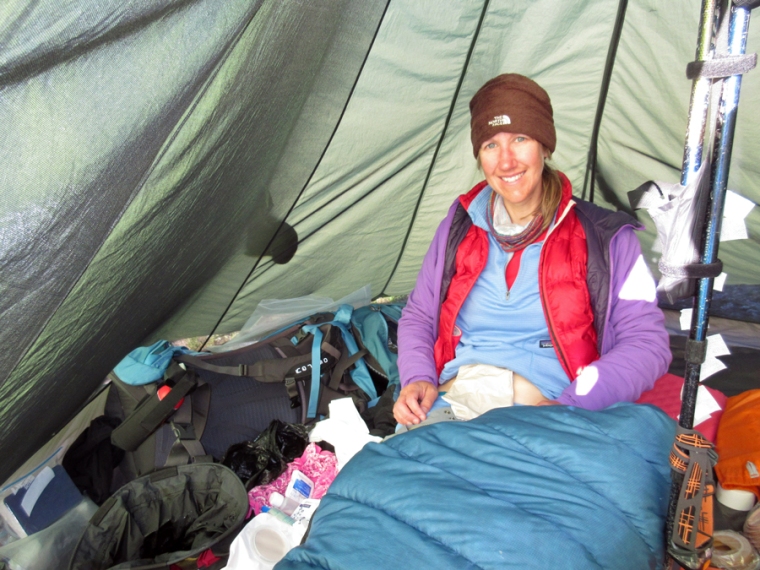
At our Peak Lake campsite, Doug shakes out my 15-degree, 800-fill down sleeping bag. It is a great lightweight bag, but wasn’t warm enough for me on this trip. I had to sleep in every layer I brought along and eventually borrowed Doug’s jacket after several sleepless nights due to being teeth-chatteringly cold. Also, we brought our pyramid shelter which is light but spacious (I dislike being crammed in a tiny tent.) It uses our hiking sticks for a center pole which saves weight. Often we will use the shelter without the inner netting which makes it even lighter. However, on our Wind River Range trip there were too many mosquitoes for that option.
Creek-crossing-for-web
Our trip in the Wind River Range included many river crossings. The stylish rubbery red shoes I am wearing are Vivobarefoot Ultra 3s. They are lightweight and allow me to safely cross streams without injuring my feet or getting my boots wet (which causes Raynaud’s Disease symptoms in my feet.) They also double as great camp shoes.

Mix the extra weight of these body-warmth necessities with the added ounces of spare ostomy supplies, the bear-proof food storage containers that are increasingly being required on public lands in the west and a few minor luxury items like my sketchbook, and the pounds add up. I am quite sure I am never going to be carrying a 25-pound pack on any trip that is more than an overnighter.

Sketch-for-web
My sketchbook and small set of watercolors never stays home.
Packing-food-for-web
Our 16-day trip in the Wind River Range involved hiking in black and grizzly bear country so special food storage regulations were in place. The white bags in this photo are called Ursack AllMiteys. They are bear- and rodent-proof and are much lighter to carry than regular plastic bear canisters. Fortunately they were a permitted food storage method in the Wind River Range (they are not yet approved for all public lands.) We brought four Ursacks full of food on our trip plus one additional stuff sack full to hang for the first few nights. It was tough figuring out how much food to bring, but we did well and only went home with a few spare energy bars. We each carried 26 pounds of food.
Ostomy-change-for-web.jpg
My spare ostomy supplies weighed about two pounds. I changed my appliance four times on the trip– once every four days. When it is cold or buggy, I usually change in the tent. Fortunately, my output is fairly thick and things are mess-free if I wrap strips of paper towel around my stoma as I work.
Ostomy-supplies-for-web
Here is a close-up photo of my supplies as I work on my change in the tent. Though I only changed four times, I brought enough stuff for eight swaps just to be safe. To keep my supplies as lightweight as possible, I did not bring any closed-end pouches as I sometimes do in case I run into situations where it may be difficult to empty. This meant I was always digging holes (about 70 on the whole trip) including at night and in the rain.

For the most part, I seem to do well as a “pack mule.” For a couple of summers during my late 20s, I worked for the National Outdoor Leadership School (NOLS) instructing 30-day wilderness backpacking courses. We carried monster packs on those trips– something my body seems to have retained the muscle-memory for despite 20 years passing by.  However, one of my biggest concerns when hauling a heavy load– or during any strenuous activity for that matter– is developing a parastomal hernia. So far I have avoided getting one and I would like to keep it that way.

So what do I do to safeguard myself?

First, I made sure to work back into exercise slowly after surgery– especially during the first year post-op. For my early post-surgery backpacking trips, I double-checked my pack weights with my surgeon to make sure it was okay for me to carry various loads. After a while, he said it was fine to listen to my body.

Secondly, I keep my core strong by doing planks and other ab-friendly exercises (once I recovered fully from surgery and got my doctor’s okay, of course!). I also am mindful of not gaining excess weight by eating a healthy diet and exercising regularly. Being overweight can cause pressure against the abdominal wall and increase one’s risk of parastomal hernia.

In addition, Doug lifts my pack up to my back when it is over about 50 pounds. Once the pack is centered on my hips and legs, my core is not stressed at all.

Beyond that, my most important tool is a hernia prevention belt. Though I have heard mixed opinions from surgeons on the degree to which these belts actually prevent hernias, the abdominal muscles around my stoma absolutely feel more supported when I wear it during activities that could be hard on the core. These include backpacking, mountaineering, rock climbing, weight lifting, snowboarding, Zumba, yoga, and coughing/sneezing when I have a cold or the flu! I figure it can’t hurt to stack the odds in my favor by using a belt.

So which belt do I use?

I wanted a belt that provided substantial support for the abdominal wall around my stoma, not just a stretchy band. My WOC nurse recommended the NU-Hope hernia belts so that is the brand I went with. I wear their Flat Panel model in the Cool Comfort Elastic option (shown on page 5 of the Nu-Hope link below.) This belt is designed with prevention in mind and is made of a breathable mesh that works great for activities that work up a sweat. It comes in various widths. I use the 6-inch wide model for most of my activities as I find it the most comfortable. The one exception is for yoga when this size prevents me from bending. Instead, I use the four-inch-wide belt for yoga.

Nu-Hope also makes models with even more support for those who already have a hernia. The belts have a hole for the pouch to extend through that is specific to the size of your flange. If you ever change the wafer size of your appliance, you  will have to get a new belt. Nu-Hope can also make custom belts if the regular sizes don’t work well with your appliance or stoma location.

Nu-Hope has a great online guide for explaining belt sizing.

http://www.nu-hope.com/beltlit.pdf

I also found the Nu-Hope staff to be extremely helpful when I called with questions on sizing before ordering my first belt. Nu-Hope does not sell belts directly. Once you know your  style and size, you order through your main ostomy medical supply company. Also make sure to check your insurance policy as it may cover a portion of your hernia belt.

Hernia-belt-for-web.jpg
Nu-Hope belts come in various widths and colors. Pictured here are the six-inch- and four-inch-wide belts in white and beige in the Flat Panel Cool Comfort Elastic option. Note that the circular portion is sized for your specific flange measurements. Belts come in standard sizes, but Nu-Hope can also make custom ones.
Cool-Comfort-Elastic-for-we.jpg
The Cool Comfort Elastic belt is made out of a breathable mesh and is wonderful for active pursuits.

I only use Nu-Hope Hernia prevention belts, but there are other brands out there. Quite a few manufacturers claim that their products are designed for hernias, but I would suggest checking with your WOC nurse for their brand recommendations. You want to make sure you get a belt that provides firm enough support and they would know which belts patients have had good experiences with.

Even though I love my Nu-Hope Flat Panel belt, I do pair it with a couple of other things to improve its performance.

First, because the width of my waist is smaller than my hips, the belt does tend to ride up to that narrow spot. I remedy this by always wearing my belt under a pair of Comfizz brand High-waist ostomy boxers or briefs. This underwear does an exemplary job of holding the belt in place so it doesn’t shift. In fact, I love these underwear for sports whether or not I am pairing them with my hernia belt. They are also wonderful for concealing your ostomy appliance under form-fitting pants and dresses. Comfizz is a brand out of the UK, but their products are reasonably priced and ship to the USA incredibly quickly. They also have great customer service!

Second, I do get some skin chaffing and soreness from the hernia belt when it is compressed under my backpack hip belt– especially with very heavy loads. I remedy this by sliding some 8″ by 8″ squares of polar fleece in between the hernia belt and my skin. This adds a bit of cushion and prevents friction. Fortunately, the fleece doesn’t make the hernia belt too much warmer to wear, as those areas would be under my thick, non-breathable pack waist belt anyway.

Hernia-belt-layering-for-we
Pictured are the layers I wear for backpacking when a hip belt can cause extra pressure on the belt and my skin. I wear Comfizz Level-one Boxers over the hernia belt to keep it from riding up. I put a layer of folded fleece between my belt and skin to prevent chafing and soreness.
Hernia-belt-1
Putting on my hernia prevention belt set up before shouldering my heavy pack. All the layers mentioned above can be seen. I also wear a cotton pouch cover to keep the plastic corners of my pouch from chafing my leg. Yes– this is many layers but they are oh-so comfortable!
Hernia-belt-climbing-for-we
This set-up works great for rock climbing too, though I usually don’t need the cushioning fleece pieces without the weight of a heavy pack pressing on my hernia belt.

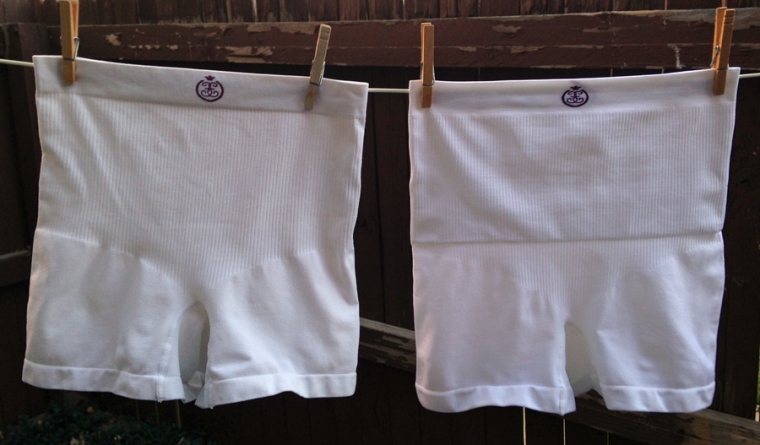
In the first couple of years after surgery, I used my Nu-Hope hernia prevention belt during all exercise. However, as the years went by and my core got stronger, it felt like overkill for some of my milder activities such as running, cross-country skiing and bicycling. However, I still like some abdominal support when engaging in these sports and found a product I love for them: Comfizz Level-two boxers.  Similar in shape to the regular Comfizz Level-one Boxers, the Level-two have an extra-thick section of stretchy fabric over the abdomen which provides really nice support when I don’t want to wear a full-on hernia belt for less core-intensive exercise. These undergarments are also available as briefs if you prefer that style over boxers.
Comfizz-level-one-and-two-b
On the left are Comfizz Level-one Boxers and on the right are Level-two. You can see the thicker fabric panel on the Level-two Boxers. These undergarments are also available as briefs rather than boxers.

Though there is no way to completely safeguard oneself against a parastomal hernia, these products help me feel much more secure during all my active pursuits. If a hernia or fear of developing one is keeping you from getting out in the wilds, I would encourage you to talk to your WOC nurse and medical team and explore belts and other options that could offer protection.

I am going to end this post with a few more photos from our big trip this summer. Happy hiking!

Cube-Rock-Pass-for-web
Only a mile left to camp! I am tired but happy on day two of our trip. This was one of the hardest with 2,700 feet of elevation gain and a heavy pack.
Indian-Basin-for-web
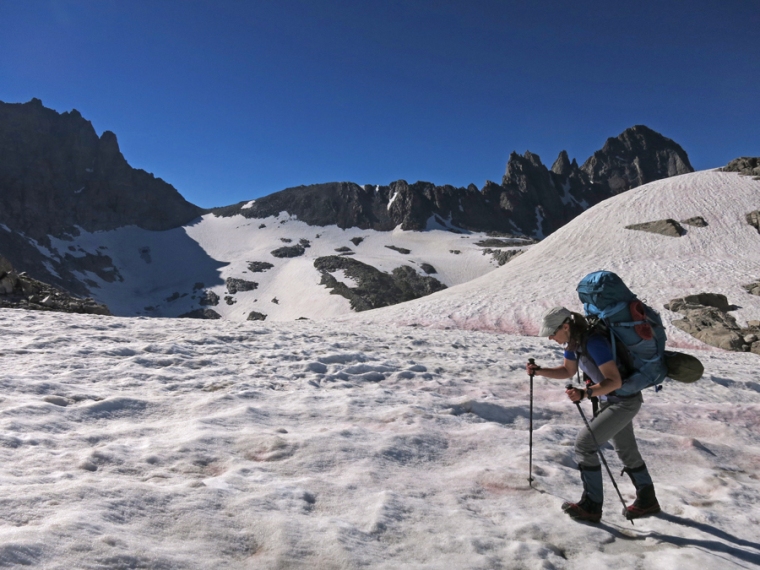
The snow levels in the Wind River Range were 200-300 percent of normal. Areas that would normally be snow-free in August were still frozen.
Map-for-web
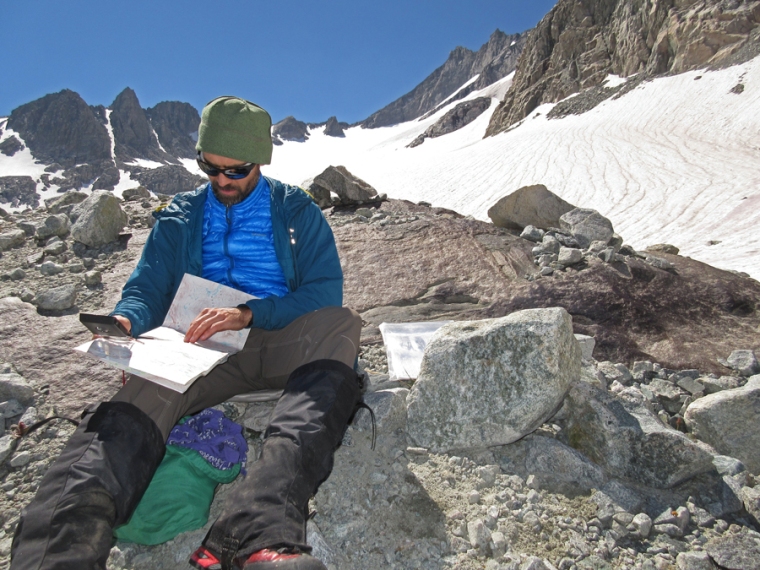
Doug does a map check on the way to the North Fork of Bull Lake Creek–one of the most remote areas of the Wind River Range. We prefer a traditional map and compass for route finding.
Blaurock-for-web
Doug surveys the landscape from our campsite along the North Fork of Bull Lake Creek beneath Blaurock Pass. This place is breathtaking and is one of my favorite spots in the Winds.
Hello-for-web
Testing out my new RockPhone. Too bad the reception wasn’t great at our campsite beneath the Knife Point Glacier. 😉
Eclipse-for-web
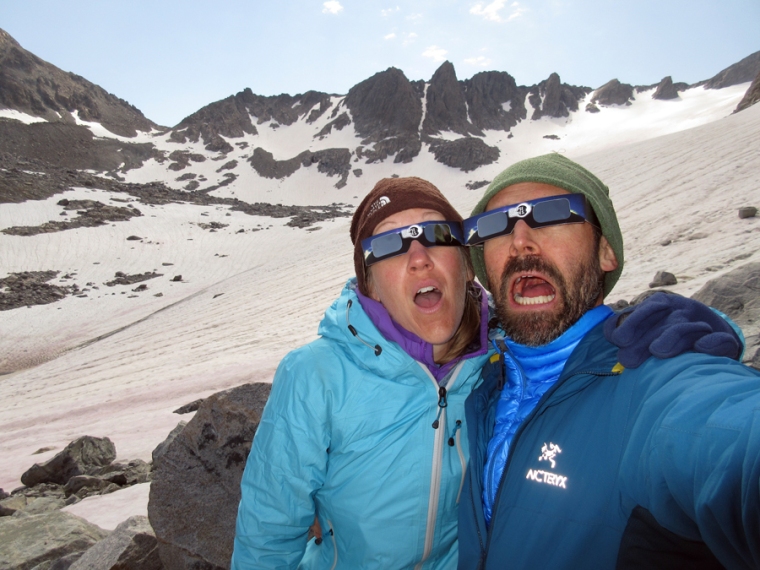
The Wind River Range was a prime spot for viewing the total eclipse, but we avoided the crowds by taking in the spectacular event from the base of the remote Knife Point Glacier. We even had our very own two-person eclipse-viewing party–complete with special celebratory trail snacks and a goofy commemorative selfie.
Knifepoint-Glacier-for-web
I ascend the Knife Point Glacier after viewing the total eclipse.
Indian-Basin-2-for-web
Is there any place in this range that isn’t spectacular? Here I travel through Indian Basin.
Titcomb-2-for-web
Doug and I have been to the Wind River Range many times, but had never previously explored the popular Titcomb Basin.
Titcomb-for-web.jpg
We are jumping for joy to be in this magnificent Titcomb Basin!
Sunset-Titcomb
The peaks of Titcomb Basin, seen from Island Lake, glow in the evening light.
Winds-flower-backpacking-fo
I stroll through the wildflowers near Clark Lake.
Clark-Lake-for-web
Doug ascends the pass to the Lozier Lakes. Clark Lake is in the background.
Porcupine-Creek-Valley-for-.jpg
Doug soaks in the peace of the Porcupine Creek Valley. We saw more grizzly bears (a mom and two cubs) than people during the two days we spent this less-traveled area of the range.
End-of-the-trail-for-web
Doug and I feel the mixed emotions of reaching the end of the trail: happy to have had an amazing trip but sad that the adventure is over. It is always hard to return to civilization after living a life of simplicity in the mountains.

Winging it in the Wilderness

You guys should continue on after Holly Lake and do the Paintbrush/Cascade Canyon Loop, suggested Ranger Josie. We had stuck around to chat with her after her inspiring evening amphitheater talk at Colter Bay Campground during our vacation in Grand Teton National Park in August. When we mentioned our hiking plans for the next day, she explained that instead of stopping at the lake, we could could keep going and complete a 20-mile loop. She had done it earlier in the summer and said it was breathtaking.

20 miles? The longest hike I had ever done in one day was around 13 miles. I was so tired at the end of it I could barely walk. No way was I going to do 20 miles. Anyway, it had been already been an action-packed vacation. Over the previous week we had hiked numerous trails, climbed Middle Teton, bouldered on huge rocks left behind on an old glacial moraine, and paddled canoes on Jackson Lake. I was hoping for a more relaxing plan for our final day. My hope was to sleep in, hike at a leisurely pace to Holly Lake and then sketch and relax. Maybe we could do the 20-mile loop another year as part of a multi-day backpack–with sleeping in between the hiking segments.

As planned, we slept late next morning and didn’t hit the trail until 9:30 a.m. We hiked the seven miles to the lake at a slow pace, stopping along the way to take photos and eat snacks. We reached our destination at 2 p.m. Much to our dismay, the wind was howling and it was too chilly to hang out for hours. I did a quick sketch and we filtered some water for the return trip.

holly-lake-2
Doug takes in the views at Holly Lake.

As we started to hike back, we passed a sign for Paintbrush Divide–the high point of the canyon was only two more miles above the lake. Hmm, maybe it would be fun to continue up the trail, I thought. Not all the way to the pass, of course, but just a little higher to get some views.

Okay, just a little farther. I ascend he trail above Holly Lake.

We climbed another mile up the canyon and the vistas seemed to get better with each step we took. Still, it was getting to be late afternoon and we figured it was probably prudent to turn around. Already, it would be a 16-mile round trip. As we were taking a photo at our intended high-point, a hiker came down the trail. She recommended we keep going until we could at least see the path up the divide. We figured it couldn’t hurt to at least take a look at the remainder of the route.

Just after a hiker took this photo of our intended high point for the day, she talked us into going a little farther.
Just after a German hiker took this photo of our intended high point for the day, she talked us into going a little farther.

Once we saw the divide before us, the choice was clear. It wasn’t much farther, so we would keep going and turn around once we got to the top. As we made our way up the rocky trail, smoke from a large fire in the northern end of Grand Teton National Park got thicker and obscured the sun. It gave the landscape an eerie, surreal hue that made the hike feel even more adventurous.

up-paintbrush-divide-for-web
High winds caused the Berry Fire in the northern part of the park to flare up during the day. The smoke from the distant fire obscured our views, but created an intriguing atmosphere.

Once we crested the divide, we were blasted by the same strong winds that were fueling the distant fire. We hiked along the pass, taking in the views and making sure not to get too close to the edge for fear of getting blown over it.  Just as we were about to head back down, two hikers serendipitously approached us. We found out that they were doing the 20-mile loop, only they were traveling in the opposite direction. They had already gone eleven miles and had nine to go.

Doug and I had a realization, we had already done almost half of the 20-mile loop. Why not keep going?

paintbrush-divide-for-the-web
We are at the top of Paintbrush Divide at 4 p.m., trying to hide from the gale. Hmmm… can we finish 11 more miles before dark? We think so! If not, we have headlamps in our packs.

We only had four hours of daylight to cover eleven miles, so we upped the pace. When the terrain allowed, we speed-walked and even jogged a bit. Within an hour, we were at Lake Solitude and an hour after that we were descending Cascade Canyon and looking at up at the spectacular Grand Teton–a peak we climbed in 1992 when we were youngsters in college.

casdcade-canyon
Is this place even real? It is so beautiful!

By 8 p.m. we were contouring around the shore of Jenny Lake and soon we were back to the car. We had made it before dark!


end-of-the-hike-for-the-web
I am tired but excited that I will make it back to camp before the shower house closes for the evening!


Driving back to the campground, it was hard to comprehend that we had just done a 2o-mile hike. I wasn’t even that sore! I was tremendously happy that we had allowed ourselves the freedom to embark on such a spontaneous adventure. Had we turned around, we would have missed out on one of the most stunning hikes I have ever witnessed.

Spontaneous adventures were something that became elusive for me in later life. In 2006,  I was not only diagnosed with ulcerative colitis, I also received the news that I had celiac disease. Due to ulcerative colitis, whenever I traveled, I had to know where restrooms were. With celiac disease, I had to make sure I always packed back-up food in case I couldn’t find gluten-free dining options.

Since my ostomy surgery in 2010, I no longer have to worry about restroom locations for urgency, but I do have to make sure to always have back-up supplies with me. I also have to change my appliance every 3-4 days or my skin isn’t happy. This can impact spontaneity as well. It can be problematic to make a last-minute decision to get up early to climb a peak on a morning when I am scheduled for an appliance change.

With all these things to consider, how do I make sure that I can still have impromptu trips? Simple–I prepare for spontaneity.

This may sound contradictory. After all, spontaneity is the opposite of pre-planning. However, by making sure I am prepared with a few basic supplies, I can be ready for any spur-of-the-moment adventures in the outdoors.

Here are three things I bring with me to make sure I am ready to wing it in the wilderness.

Closed-end ostomy pouches
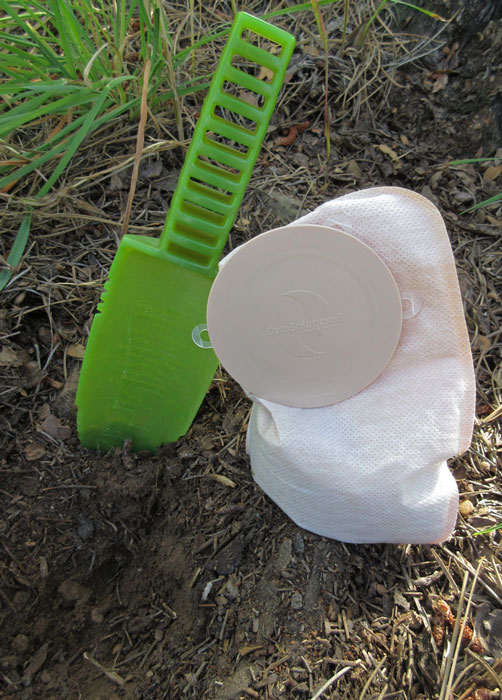
When on outdoor trips, I most often use drainable pouches and empty them into a “cathole” I dig in the ground. However, I am a hardcore LNT enthusiast, and I strive to follow best practices when disposing of my waste in the backcountry. That means digging holes six inches deep in organically rich soil, 200 feet from water sources, campsites and trails. Unfortunately, good places to bury waste are not always easy to find. Multiply that difficulty by the fact that I have to locate as many as five to eight such places a day with my emptying frequency! If my plans change and I find myself traveling over rocky terrain where digging holes is not possible, or if I need to cover a lot of ground in a hurry (like on our loop hike), swapping out closed-end pouches and packing out the full ones becomes my preferred method for dealing with waste. On every hike I go on, I make sure to bring several closed-end pouches and small plastic bags to pack them out in. Ostosolution Ostomy Pouch Disposal Seals are also handy to snap over the full pouch openings and hold the odor in.

lake-solitude-for-the-web
Swapping out a pouch along the trail above Lake Solitude only took a couple of minutes. Locating a good place to dig a hole and then emptying would have taken at least 15 minutes. This was my third swap on the hike, so it’s easy to see how that time could add up.

Salty food
You won’t catch me with a few energy and protein bars as my only food source in my pack. I bring a stuff sack full of a wide variety of foods including dried fruit, chocolate, cheese and crackers, bars, peanut butter, cookies, and–most importantly–salty snacks. Since getting an ostomy, I seem to be prone to salt depletion on the trail. It usually starts with nausea and dizziness and then progresses to a gnarly headache with fatigue. All I have to do to make it go away is eat something salty. My doctor told me to always hike with plenty of sodium-rich foods so I make it a habit to bring pretzels, jerky, salted nuts and chips such as Fritos. Also, I always bring a little more food than I need. Yes it adds weight to my pack, but it comes in handy if I change my hiking plans mid-way (or if I were to get injured or lost).

Water filter
As an ostomate, I am also prone to dehydration. On most shorter day hikes, I carry a 3-liter CamelBak. However, this would not be adequate on a bigger hike or if I ended up staying out longer than expected. A great way to remain adaptable to changing water needs is to carry a tool to treat water. I have used a variety of methods including iodine tablets, Aquamira and a SteriPEN. However, my favorite water treatment method is using a water filter. These come in a variety of designs, but my number one choice is the Katadyn Gravity Camp 6L Water Filter. You simply place it in a location that is higher than your water bottle or bladder, and let gravity force water through the filter. No pumping is involved and it filters a liter of water in roughly a minute.

water-filter-for-the-web
With darkness fast approaching and five more miles to go, we were grateful to have the ability to filter water quickly. I drank seven liters on the hike.

When we were trying to choose whether or not to complete the 20-mile Paintbrush/Cascade Canyon loop hike, we thought about the late hour, our stamina, and encountering mountain lions or bears in the darkness. However, my ostomy never entered the equation as a factor in our decision. I knew that by preparing for spontaneity, I was all set for the unplanned adventure!


My favorite products for dealing with ostomy waste in the backcountry

Just one more cast, I thought, as I tossed my line in the still waters of Middle Willow Lake in the Gore Range of Colorado. It was a phrase I had been repeating to myself all morning, and by that time I had completed dozens of “final” casts– almost every one hooking a hungry brookie. I nervously looked at the blackening clouds coming over the ridge but even the threat of a downpour couldn’t stop me from flinging my line in the lake again. Sure enough– a trout grabbed the elk-hair caddis fly. I reeled the fish in, released the hook from its mouth and watched it swim away.

Fly fishing before the storm came in.

Suddenly, a swift downdraft disrupted the glassy surface of the the lake and a crack of thunder smashed the silence of the mountain basin. That really would have to be my last cast of the day.

Doug motioned to me from down the lake shore that he too was ready to call it quits. Hail let loose from the sky and pelted my forehead as I hefted my pack onto my back and fastened the hip belt. That is when I noticed the bulging ostomy pouch on my belly and remembered that I had not emptied it since before breakfast; it was now late afternoon. Oh well. It would have to wait. Doug and I threw on our raincoats and made our way through the forest and back to camp.

When the rain didn’t let up for hours, I cursed not emptying my pouch earlier when the weather was fair. I could have taken my sweet time digging a perfect hole in the perfect location while blanketed in warm sunlight. Instead, I was cold, damp and stuck under our cooking tarp watching the torrential rain form small lakes around our backcounty site. Teeth already chattering from the damp chill, there was no way I was going to take a ten-minute hike into the forest surrounding camp to empty my pouch. Fortunately there was another option: in the tent I had a supply of closed-end pouches on hand. Within a few minutes I had a fresh one popped on and the used one bagged up.

Doug waits out the rain under our cooking tarp.
warming-up
It is very important to color-coordinate your mug and jacket while in the backcountry.

Our backpack in the Gore Range has been just one of many outdoor adventures we have embarked on this summer (which is one of the reasons I have been so absent on this blog!) We also went on two more backpacking trips, including a short trip in the Mt. Massive Wilderness and a rugged nine-day adventure in the Sangre de Cristo Wilderness– all in our home state of Colorado. Early June also included a climb of the First Flatiron in Boulder, CO. Each trip was unique, and I loved having a variety of waste management techniques to pull from. In this post I will highlight my favorite products and techniques for dealing with output during those situations when emptying would be inconvenient or impossible. Some of these methods I have written about before and are tried and true for me. Others are new things I have just recently discovered.

Our first backpacking trip of the summer was a three-day adventure in the Mt. Massive Wilderness in Colorado.
Let’s go that way! The summer of 2015 was filled with three amazing backpacking/ fly fishing trips in our home state of Colorado. Our first one was a was a three-day adventure in the Mt. Massive Wilderness.
Trip number two consisted of a four-day hike into the Willow Lakes area of the Gore Range.
Trip number two consisted of a four-day journey in the Willow Lakes area of the Gore Range.
We ended the season with a 9-day off-trail backpacking and fly fishing adventure in the Sangre de Cristo Wilderness in Colorado.
We ended the season with a nine-day mostly off-trail backpacking trip in the Sangre de Cristo Wilderness.

Closed-end pouches
So often, closed-end pouches are labeled as being designed for colostomies. True, ileostomates tend to have more profuse output which makes swapping out multiple pouches everyday an expensive endeavor.  However, for certain short-term situations, closed-end pouches can be an incredibly useful tool for all people with ostomies.

There is no place to drain a pouch on long rock climbs such as the First Flatiron, which Doug and I made an ascent of in June.
There is no place to drain a pouch on long rock climbs such as the First Flatiron in Boulder, CO, which Doug and I made an ascent of in June.
Swapping out a closed-end pouch on a climb up the FIrst Flatiron this summer was easy.
Fortunately, swapping out a closed-end pouch on a climb is easy– even while tied in with my harness buckled.

I use them on rock climbs, trips near water, snow adventures and any other times when the environment does not allow for digging holes to bury wast. They are easy and mess-free to swap and pack out.  Moreover, lately I have discovered their handiness for nighttime use on backpacking trips.

Though I dig holes and empty 90% of the time while backpacking, overnight emptying has always been a challenge for me. For some reason my digestive system changes when I am doing strenuous activity all-day and I have to empty a lot more at night than I do at home.

In order to minimize my impact on future backpackers, I like to walk a fairly long distance from camp to empty, and I only dig holes in areas where no one would likely set up a campsite in the future. The problem is, places like that are hard to find in pitch blackness. I used to pre-dig a few holes during the day and then make mental notes to find them in the dark, but it was still a challenge to hike to these locations in the middle of the night when I was sleepy. If it was raining, it was even worse. I soon discovered it was a lot safer to stay close to camp and swap out closed-end pouches in the middle of the night. During the day, I would go back to using a drainable pouch.

Hiking into the darkness to find a place to empty my pouch is not my favorite thing to do. I have since started swapping out closed-end pouches at night on wilderness trips so that I don't have to do this.
Hiking into the darkness to find a location to empty my pouch is not my favorite thing to do. I have since started swapping out closed-end pouches at night on wilderness trips so that I don’t have to do this.
It feels great to relax in my sleeping bag knowing I am not going to have to hike off into the dark woods to empty.

Doggie Poo Bags
Managing an ostomy in the wilderness requires packing out used supplies. One of my favorite items to secure used pouches and wafers are simple opaque black doggie-poo bags. They are cheap, non-bulky, and lightweight. Moreover, Ziplock bags can easily un-zip or pop open when jostled. However, doggie poo bags can be tied tightly with an overhand knot. Even when packing out pouches with the the most watery output, I have never had one leak.

LOKSAK OPSAK Odor-proof Barrier Bags
Though doggie-poo or other plastic bags may work well for holding used pouches, they don’t do a good job of containing odors.  Even when I double-bag them in a regular Zip-lock bag, the smell still comes through. One great product for solving this dilemma is OPSAK odor proof barrier bags. They come in two different sizes and are great for holding in odors when you need to pack out full ostomy pouches. They are pricey, so I place all my sealed doggy-poo bags into one OPSAK, empty it into the trash at the trailhead, and then save it for another trip.

My pouch pack-out trifecta: the full pouch goes into a doggy-poo bag, that goes into a Ziplock, a few of those go into a Ziplock and than all of it gets placed into a re-usable OPSAK Odor-proof Bag.
My pouch pack-out trifecta: the full pouch goes into a doggy-poo bag, a few of those go into a Ziplock to contain odors a little bit more, and then those get placed into a re-usable OPSAK Odor-proof Bag.
OPSAK bags come in a large size too for a more extended expedition.

OstoSolutions Ostomy Pouch Disposal Seals
Unfortunately, closed-end pouches that are full of ostomy output are incredibly heavy and take up space in one’s pack. I once weighed my full nighttime pouches on a two-night backpack trip and they collectively weighed three pounds. Multiply that for longer trips and the extra weight becomes quite burdensome.

I was faced with such a dilemma on a nine-day backpacking trip in the Sangre De Cristo range of Colorado in August.  This trip was a particularly strenuous one with difficult off-trail travel over incredibly steep mountain passes. Our packs were heavy due to the amount of food we had to carry and the last thing I wanted to do was add more weight to my pack in the form of closed-end pouches filled with poop. At first I had planned to just go out into the night to empty to save from carrying the extra weight, but every evening at bed time the storms and torrential rains seemed to roll in.

I scramble up a steep gully with a heavy pack on a 9-day off-trail backpacking trip in the Sangre de Cristo Range, Colorado.
I scramble up a steep gully carrying a heavy pack on a nine-day off-trail backpacking trip in the Sangre de Cristo Wilderness, Colorado.
I didn't need the added weight of full used ostomy pouches in my backpack.
Food and supplies for such a long trip were heavy, and I didn’t need the additional weight of full used ostomy pouches in my backpack.

Fortunately, I found a great way to solve this problem by using some OstoSolutions Ostomy Pouch Disposal Seals that I had brought along. In the tent, I would swap out a closed-end pouch as I always had. However, instead of just tossing the full one into a baggie and tying it shut, I would cap it with an OstoSolutions Seal. In the morning, I would take a long hike from camp and dig a cathole in perfect Leave No Trace style. I would then remove the OstoSolutions Seal from the full pouch and dump the contents in the hole. Finally, I would snap the OstoSolutions Seal back on the now-empty pouch and bag it up to be packed out. The weight savings in packing out used (but no longer full) pouches was huge! The OstoSolutions Seals themselves are very light. I found that packing one for each night (plus a few more for those rare nights when I might have to empty twice) was easily doable. The seals would also be handy in alpine areas where digging holes to empty can cause damage to the delicate environment. A full pouch, capped with an OstoSolutions Seal, could be packed out until one got below treeline. There the seal could be snapped off, and the contents of the pouch buried in a much less fragile place.

I can snap an OstoSolution Seal on my pouch at night and then pop it off later to empty the contents into a cathole (a six-inch deep hole dug in the ground.)
I can snap an OstoSolutions Seal on my full pouch at night and then pop it off later to empty the contents into a cathole (a six-inch deep hole dug in the ground.)
Doug and I descended the steep gully below the notch in this photo on day seven of the trip. It was essential to keep our packs as light as possible in such terrain.
Doug and I descended the steep gully below the notch in this photo on day seven of the Sangre de Cristo trip. Keeping our packs as light as possible was essential in such rugged terrain.

Don’t let a fear of being away from a bathroom prevent you from heading into the wilds. With these four supplies (closed-end pouches, doggie poo bags, OPSAK bags, OstoSolutions Seals), you will be ready for storms, darkness, snow, rock, water, a heavy pack or any other challenges that might present themselves in the backcountry. If these supplies end up not working for you, get creative. An ostomy can be managed in even the craziest situations– it is just a matter of experimenting and finding the right tools for the job.

Yep
Stormy weather seemed to follow us on all of our trips this summer! Doug casts a few more times before we hastily return to camp.
Not another storm! Dealing with my ostomy in foul weather was an everyday occurrence on most of my trips this summer.
Yikes! Yet another storm! Dealing with my ostomy in foul weather was an everyday occurrence.
However, the clouds did part enough that I got some glorious backcountry lake swimming in.
However, the clouds did part occasionally, and I was able to get some glorious backcountry swims in. I do not have to make any special modifications to my ostomy system when swimming– it adheres just fine as is.


These goats have nothing to do with ostomies, but I did see them on one of our trips and they are cute.
These goats have nothing to do with ostomies, but I did see them on one of our trips and they were cute.


Patience and progress

It’s as harsh out here as on top of peak in a snowstorm. This thought pounded in my head as I cross-country skied down a slope in my second-ever biathlon. The wind was blowing against me so strongly that I had to use my poles to make downward progress. I was freezing in my minimal layers, and I felt eerily alone on the course with no one in sight and snow swirling all around me. The weather was declining rapidly, and I was relieved to be on my final of five laps.

In the distance I could see the biathlon range as I steadily made my way up a final incline. Snow was filling in the trail with drifts, and I felt like I could have walked faster than I was skiing. All that powder would have been much beloved if I were out snowboarding, but I didn’t much appreciate it in a Nordic race. As I got closer to the finish line, I could see the person recording times from a stopwatch. It seemed to take forever for me to reach him. But I finally made it! I finished the race and was super happy that I stuck with it and did not give up. I couldn’t remember doing anything that felt so physically strenuous– not even hiking up Mt. Rainier. Skate skiing is one of the most aerobically intense activities I have ever done.

Happily leaving the starting line before the wind and snow picked up.
Happily leaving the starting line before the worst of the storm blew in.
I could barely stand up in the wind after shooting in the prone position. Miraculously, I actually hit four of five targets!
I could barely stand up in the wind after shooting in the prone position. Miraculously, I actually hit four of five targets at 50 meters away!

We wrapped up the weekend with more fun. After completing the race, we stayed overnight at Snow Mountain Ranch/YMCA of the Rockies (the place where the biathlon was held) and even hit up the climbing wall in the pool. The next morning, we got up early and drove to Copper Mountain to go snowboarding.

A little post-race climbing at the pool.
Powder day at Copper Mountain!

When the event results came in a day later, I discovered that I had the slowest pace of anyone who finished any of the various distances. It wasn’t a surprise. This is a new activity for me and I didn’t expect to be good at it right away. I had been working on my shooting a bit, but had put very little attention into becoming better at skate skiing. That changed last weekend when I took a beginner lesson and picked up countless tips that will help me improve. I also plan to begin working on my cardiovascular fitness again by running and going skate skiing as much as I can. I know it is going to take a lot of time and many little steps to get better at the sport.

That reminded me a lot of getting back into the fitness activities and sports I loved after ostomy surgery. Like training for biathlon, it wasn’t a quick process. One of the most common questions I get from blog readers is how long it took me to get back to “X” activity. Since a lot of information on that subject is buried in other posts, I thought I would create a summary of how long it took me to return to activities and what some of the challenges were. Keep in mind that I did have some significant complications with my abdominal incision healing due to a rare reaction to my particular suture material. This extended my healing time.

Snowboarding:  I did this activity for the first time at around five months post-op, but because it was the end of the season, I was only able to get a few days in. I was surprised at how effortlessly the movement of boarding came back to me after losing so much strength after surgery. The most difficult part was getting back into a standing position after taking a tumble. Due to the crunch-like movement involved, it felt hard on my core. I wore (and still wear) a six-inch wide hernia prevention belt to help support my abdominal muscles. At first I was also careful to not venture onto icy terrain since falling onto my butt hurt the area where my anus had been removed. By the next season (about a year post-op), all that pain was gone and I was able to return to my pre-surgery level of boarding.

Getting up after all the falls on my first post-surgery snowboarding trip was tough on the abs!
Getting on my feet during my first post-surgery snowboarding trip was tough on the abs!

Hiking and backpacking: I went on my first backpacking trip at around five months post-op as well. I checked with my surgeon to make sure carrying 25 pounds was okay and then headed into the backcountry at the first opportunity–which happened to be a very cold and snowy April weekend!  Once again, I wore a six-inch wide hernia prevention belt and was mindful to keep the weight in my pack light. Doug carried many of my things and helped lift the pack onto my back. Once it was centered on my legs, it didn’t strain my abdominal muscles at all. The cold made this first trip with my ostomy difficult, but I was happy with the extra challenge. I knew if I made it through that, warm weather adventures would be easy.

After this trip, I kept hiking every weekend and slowly upped the distances traveled and amount of weight carried. I went on a few more overnight trips and began hiking 14,000-foot peaks. I remember walking like a turtle on the first one, but I just kept at it. By ten months post-op, I was able to go on an eight-night backpacking trip carrying 52 pounds.  Through all these adventures, I was continuously experimenting with supplies and techniques for dealing with my ostomy outdoors and I tried to put myself in challenging situations to maximize my learning and face my fears. For instance, I could easily have changed an appliance before a wilderness trip, but instead I would purposely wait to do it in my tent in the backcountry just so I could get the practice and become confident with my ostomy in those situation.

A little snow couldn't keep me out of the backcountry once my surgeon gave me the go-ahead to carry a pack again at 5 months post-op.
A little snow couldn’t keep me out of the backcountry once my surgeon gave me the go-ahead to carry a pack again at 5 months post-op.

Running: I waited seven months after surgery to go running and I progressed really slowly. For whatever reason, this activity made me much more fatigued than hiking or backpacking. I also had pains in various areas of my abdominal wall (almost like a stitch or side-ache in the muscles surrounding my stoma) for almost a year after surgery. I never knew exactly what caused this, but it always felt okay again a day or two after running so I chalked it up to muscle fatigue. After all, I had been cut open from belly button to pubic bone. That is bound to affect the abdominal wall a bit! Eventually those muscle aches went away and now I am able to go on long runs with no discomfort. I also wear a six-inch wide hernia prevention during this activity to help support my abdominal wall.

Jumping for joy on my first trail run which happened a little over a year post-op.

Rock climbing: This is the activity I took the longest to return to. Climbing involves many twisting and stretching movements and a lot of physical exertion. My surgeon never said I had to wait a year to go, but that is what I decided to do in order to give myself plenty of time to heal. I knew my ostomy was permanent and I wanted to do everything in my power to reduce the possibility of a long-term injury like a parastomal or incisional hernia. I was willing to wait as long as it took for my body to tell me I was ready. In the meantime, I worked on hiking and backpacking so it never felt like I was sitting around waiting to climb. To get stronger while I was waiting, I worked with my physical therapist to strengthen my core with gentle and safe exercises. By eleven-months post-op, I finally felt that I was strong enough to rock climb. I started in the gym by ascending routes that were easy and low-angle. Then I started to do the same outside. Over the following year, I slowly bumped up the difficulty of routes I was attempting and ventured onto more vertical terrain. At 22 months post-op, I led my first easy sport route. Now that I am over three years out from surgery, I am climbing in the gym on a weekly basis, doing overhanging routes and am back to scaling rock walls at my pre-surgery level. The only thing that I have yet to do is return to leading traditional routes where I place my own gear. Just like with every other strenuous activity, I always wear a six-inch hernia prevention belt.

Leading a climb at Shelf Road in Colorado this fall. I was back to leading sport climbing routes 22 months after surgery.

Yoga: Like rock climbing, I waited a year to do yoga. I know I could have gone earlier, but I was busy working on the core exercises with my physical therapist and decided to wait to try yoga until my incision area felt solid. Interestingly, I found corpse pose to be one of my most uncomfortable poses. Lying on my back made my incision area ache like crazy. I think this was the result of horrible posture during the first four months after surgery when my incision was extremely painful. During that time, I was protective of the area, and I found myself walking in a hunched-over position. It took a while to reverse that and make my muscles to feel okay with being lengthened again. Nowadays, corpse pose feels fine and the only thing I still have trouble with are bridge positions. My body tells me to go easy on those and so I do!  I wear a hernia belt while doing yoga too, but switch to a four-inch model as it is easier to bend with that width.

Bicycling: This sport was gentle on my body and would have been perfect after surgery save for one thing: my butt hurt from having my rectum and anus removed. And this pain was not quick to go away. It took almost a year for the deep muscles in that area to feel like normal again. Fortunately, once I hit six months-post op, my pain had at least diminished enough that I could sit on the seat without too much discomfort. Now I can spend hours on the saddle with no issues.

My first bike ride at six months post-op: a short jaunt to see a Rockies game. It did hurt my healing butt a bit, but was tolerable.
I took my first bike ride six months post-op when Doug and I pedaled a short distance to see a baseball game. It did hurt my healing butt, but was tolerable.

As I get into my new sport of biathlon, I realize that it is going to take a lot of hard work and patience to get better. I know someday when I am skiing a bit more efficiently and faster, those early times when I struggled up the hills or felt like taking a nap in the snowdrift will seem like a distant memory. It was that way with my ostomy. Getting back to my pre-surgery activity level took perseverance.  My progress sometimes seemed dauntingly slow. However, as I moved towards that goal, I celebrated each small victory. Before I knew it I was back on my favorite slopes, trails and rock faces and my life was richer for all the tiny but amazing steps that got me there.

“It is good to have an end to journey toward; but it is the journey that matters, in the end.”
-Ernest Hemingway

Me and my wound vac going for our first trail hike after surgery. I traveled a whopping 1/8 mile and I was thrilled. After having major incision healing complications, this was a huge milestone for me and I went home and celebrated with my first post-op beer.
Me and my wound vac returning from our first trail hike after surgery. This was four months after my operation and I traveled a whopping 1/8 mile. After having major incision healing complications, this was a huge milestone for me and I went home and celebrated with my first post-op beer.

The stars aligned for my trip up Rainier (feat. new video)

I must admit it. I have been very fortunate when it comes to my ostomy. I have had the best medical team imaginable through my UC and surgery journey. I have a wonderfully constructed stoma that functions perfectly and my wafers never come loose or leak. As of yet, I haven’t had the troubles with foods or blockages that some people with ostomies do. I don’t take any of this for granted and try to live each day with a sense of gratitude over the way things have turned out and for my restored health.

I felt this same level of thankfulness many times on my Rainier climb. I would stop for a few moments, look around in amazement and think I can’t believe I am really here and then close my eyes and give a silent thanks. Leaving the park after the climb was really hard. I didn’t want to let go of all I had experienced on the mountain. As we drove away, I kept wanting to take one last glance at the peak–as if each additional view would somehow help me better process all that being up there had meant or would make the memories more lasting. My ascent of Rainier couldn’t have turned out more perfectly, and it felt as if the stars had aligned for so many aspects of the trip:

My climbing team was amazing
I climbed with the best group of people that anyone could ask for. We had a total of four guides and eight participants in our team. Just by sheer luck of schedules– two of our guides also happened to be doctors and three of the other clients were nurses. Though I didn’t talk about my ostomy a lot on the climb (I had other things to focus on), having teammates with medical knowledge made bringing it up infinitely easier.

Our group met at the guide service headquarters the day before our climb to go over gear and logistics. After the meeting, I stayed back to talk with Emily Johnston, our lead guide, and also an ER doc. I brought up some of the unique challenges my ostomy presented (hydration, having to empty on rest breaks, etc.). She had some experience with patients who had ostomies and was very understanding and matter-of-fact about it. From that point on, I knew there would be no awkwardness when I had an ostomy-related question or needed to deal with it on a rest break.

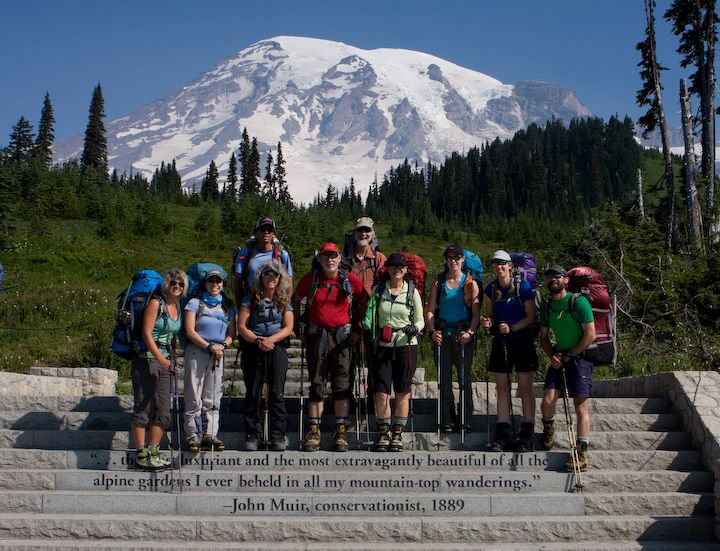
Our team.
Our team.

All four of our guides were amazing and top-notch. One of our guides, Craig John, had made it to the top of Everest. Liam O’Sullivan, another guide and doctor, had set a speed ascent record on Rainier in 2008. Emily, Liam and Craig had also climbed Rainier over 100 times. Our final guide, Jeff Ward, was certified with both the International Federation of Mountain Guides Associations as well as the American Mountain Guides Association and instructed other alpine guides. Suffice it to say that we were in very good hands.

The other climb participants were some of the nicest people I have met. We formed a quick bond and everyone was so encouraging and supportive of each other. I truly hope that someday we will get to meet up in the mountains and climb together again.

Our team rests before roping up and heading to high camp.
Taking a few minutes to rest before roping up and heading to high camp.

The weather cooperated
Day one was sunny and clear blue, but when we woke up on day two, an angry looking lenticular cloud had situated itself over the top of Rainier. Fortunately, we were only practicing glacier travel skills and rope work near our low camp at Camp Muir that morning. After a short hike to the high camp at the Ingraham Flats in the afternoon and an early dinner, a ferocious thunderstorm blew in. Not only were we surrounded by intense lightning–which was fortunately attracted to the higher ridges and not our camp–but three to four inches of fresh graupel (soft hail-like snow pellets that resemble the innards of a bean bag) fell. The forecast didn’t look good for our summit attempt the next morning either, and we went to bed feeling disappointed that we probably weren’t going to make it any higher on the mountain.

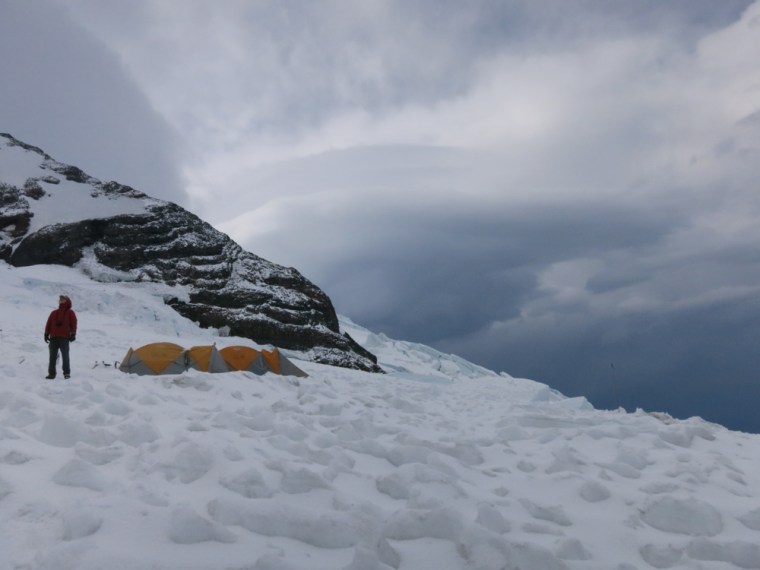
Making our way to high camp a couple of hours before the severe storm blows in.
Making our way to high camp a couple of hours before the severe storm blows in. The crevasses were scary but beautiful.
My father-in-law Peter checks out the spectacular post-storm clouds.
Home sweet home at high camp.
Home sweet home at our high camp at the “Flats” on the Ingraham Glacier.

Much to our happy surprise, we woke up to our  guides’ voices telling us that the skies had cleared! We quickly ate breakfast (at 11:30 p.m.–yes, that’s right, in the middle of the night), got packed up and then tied in with our assigned rope teams. It was slow going with all the fresh deep graupel on the trail which made it feel like we were walking in deep sand. I was second in line, and for every step forward, I slid a half a step back.

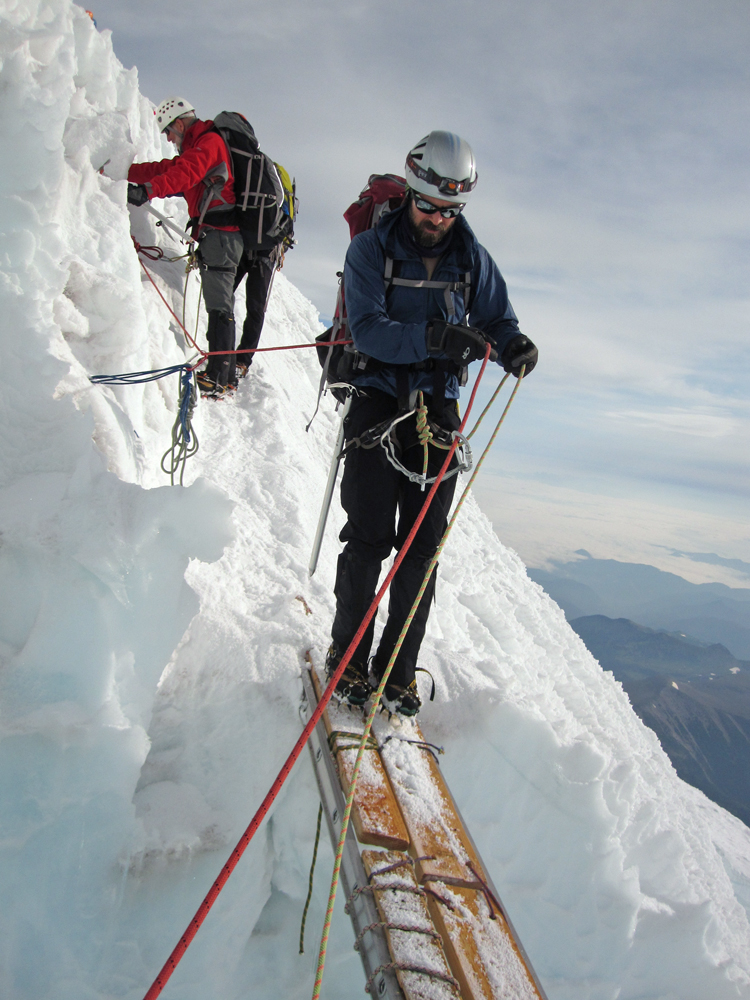
The route was also more technical than it usually was at this time of year. Several larger crevasses had opened up, and we had to cross the gaping abysses by walking across extension ladders secured on each end. When I shined my headlamp into one of the voids I could not see the bottom. As we hiked, we could see that the stars were disappearing in the dark sky– more clouds were coming in. We pushed on and reached the top of Rainier at 7:30 a.m. We were only able to bask in our success for maybe ten minutes before it was time to head down. The clouds were looking alarmingly like the ones that had just dumped on us the previous evening. Even in good weather, the technical crevasse sections of the route had a tendency to cause a bottleneck of climbers. Being stuck waiting in an exposed place surrounded by lightning would have been terrifying and dangerous. Though we all would have loved to spend more time on top, we knew it was not worth the risk. As it turned out, the clouds blew over without incident and we ended up having great conditions for our descent.

Peter, Doug and I on the top of Rainier!
Peter, Doug and I on the top of Rainier! They can’t be seen in the photo, but some ominous storm clouds were gathering to the south. Fortunately they never materialized into much and we had good conditions on the descent.
Descending the upper slopes of the mountain.
Another team makes its way across the most technical part of the route. A climber crossing a ladder over a large crevasse can be seen in the center of the photo.
Another team makes its way down the route. A climber crossing a ladder over a large crevasse can be seen in the center of the photo.
Doug makes his way across a ladder that bridges a gaping crevasse.

My ostomy behaved
Two days before I was to leave for my climb, my ostomy acted up for no apparent reason. I had pure liquid output for a while and when I changed my appliance wafer one final time before leaving, I noticed I had numerous ulcers on the surface of my stoma. I had experienced these on many occasions before and even had them biopsied (which only showed non-specific inflammation and not Crohn’s). However, this time there were more ulcers than usual and some of them looked different. Along with he circular ones that I have been getting on the side of my stoma, there were strange elongated amoeba-shaped ulcers on the tip and just barely extending into the inside of my stoma. I thought, Oh no! I don’t need something new to deal with right before heading out on the climb.

I decided not to worry about it. If I had liquid output and had to change my closed end pouches more frequently along the route, so be it. I had also trained with a much heavier pack than I would actually be carrying on the trip. I knew that if I had to bring more water to offset any extra fluid loss, I would be fine with the pack weight.

Luckily, the morning we left the trailhead, my output thickened and my ostomy fell into its usual pattern of having to be emptied every four to six hours. The first day of the climb I was even able to go one stretch of eight hours. When I returned to my lodging after the climb and put on a new wafer, I noticed the ulcers had also started to go away. Whew!

I ran into one of my IBD role models on a rest break
Years ago, Doug did some website work for International Mountain Guides and met with the three guys that ran the company: Eric Simonson, Phil Ershler and George Dunn. When it came time to climb Rainier, we knew we wanted to make the trip with their guide service.

In 2006, when I was first diagnosed with ulcerative colitis, I also found out that Phil Ershler had Crohn’s disease and had recovered from colon cancer. He and his wife Sue had just shared their story in the book Together on Top of the World which chronicled their journey to overcome those challenges and climb the seven summits together. I read the book and went to see them speak at a local climbing shop and was deeply moved. The things that Phil had gone on to do in spite of IBD were truly remarkable. As my disease continued to worsen over the years, Phil’s story remained an inspiration to me.

When we knew we wanted to do our climb with International Mountain Guides, I emailed Phil and asked him his thoughts on doing the climb and what route might work best for me. He gave me some great suggestions and was really encouraging. As luck would have it, we ran into Phil on the way to Camp Muir on day one of our trip. He was descending from a day hike with his wife and a friend and happened to pass by just as we had paused for a rest break. He stopped to chat with our group, and I pulled him aside afterwards to thank him in person for the encouragement and inspiration. I still can’t believe that of all the days on the mountain… and all the people who climb it… and of all the places to take a rest break… we ran into Phil right there that day. Seriously. What are the chances?!

Chatting with Phil Ershler, co-owner of International Mountain Guides, at a rest break.

Though there were many fortuitous things on my climb, there were also aspects that were not just a matter of luck:

I trained really hard
The months before my climb were a roller coaster ride of injury and uncertainty. From being diagnosed with steroid-induced avascular necrosis in my shoulder in December to having hip and Achilles tendon problems in the spring– I really thought I might never be able to do the climb. However, I did everything I could to make it happen. I worked diligently with my physical therapist to get to a point where I could at least hike and aqua-run again and then did those activities week after week. If I was tired after work, I still found the motivation necessary to head to the pool. When the alarm went off at 1 a.m. every weekend to hike a big peak, I rolled out of bed and did it. Once on Rainier, this training made the climb so much easier. I still can’t believe how healthy and strong I felt up there; it was everything I had hoped for.

I was willing to ask tough questions
When I filled out my application for the climb last fall, I was very open about my ostomy. I wrote about the challenges it presented and asked for feedback from the staff about how I could handle these things on the climb. No– it wasn’t easy writing to strangers and explaining ostomy waste and my various needs related to it. However, because I was straightforward and honest about my situation, I got some amazingly helpful suggestions and gained insight into how I could adapt to the conditions I would likely encounter on the trip. Once I got up there, I was able to enjoy the climb and not worry about my ostomy because I knew what to expect.

I did not give in to fears
There were a plethora of things to be nervous about in regards to my ostomy on Rainier. Would I be able to stay hydrated on long days when all our water came from snow and could only be obtained at camp?  Would it be really hard to swap full pouches on steep slopes in the cold? What about when being roped up on a team? Would my heavy pack be a problem? How much should I tell my fellow team members about my ostomy and when? I knew rest breaks were kept short. Would I have enough time to empty my appliance plus refuel and hydrate?

Instead of getting too worried about any of these things or letting them stop me from going, I equipped myself with as much information as possible to help me prepare for the trip. Beyond that, I wholeheartedly jumped into the unknown and let it play out minute by minute. There were many times that I had no idea where I would swap out a pouch within the next hour or when a conversation with another person might turn to my ostomy. I figured it out as I went along and that is one of the things that made it such a grand adventure.

On the way to the high camp, we had to move quickly through an area prone to rockfall.
As we crossed the Cowlitz Glacier on the way to high camp, we had to move quickly through an area prone to rockfall.

The video in this post covers some highlights of the trip and conveys the emotions of the climb better than I could ever express in writing. Due to the fast pace of the climb and the fact that we were moving through difficult terrain in roped teams, carrying ice axes and wearing heavy gloves, we weren’t able to record nearly as much footage as we usually do for our films. I plan to do two more written posts in the upcoming weeks covering more details about the Rainier trip: one on the specifics of how I managed my ostomy on the climb and another regarding the sometimes challenging issue of knowing how much information to share with others regarding one’s ostomy.

Rainier is on the front burner

When life gets busy, some things end up on the back burner. Lately, that item has been sleep. There has barely been a night in the past couple of months when I have gotten more than seven hours of shuteye—usually the number has been closer to five and there have been times it has been less.

What has forced sleep onto the back burner?  In part, it’s a large, glaciated peak named Mt. Rainier that I will be climbing very soon. Along with my full-time job, life lately has consisted of these four things:  hiking peaks every weekend to prepare for Rainier, going to the gym in the evenings to train for Rainier, keeping up with my physical therapy so that my joint issues don’t crop up on Rainier, prepping and packing for the Rainier climb. See a theme here? All these things take up an incredible amount of time. Many evenings I don’t get to bed until late trying to squeeze it all in.  Most every training peak we have done has required a wake-up time of 1 a.m. in order to make it to trailheads early so that we can summit peaks before afternoon storms roll in. And even then—we experienced static electricity and buzzing hiking poles on one peak as a rogue storm cloud blew in at 9:30 a.m. Yikes!

With the climb on the front burner and sleep on the back one, my blog has worked its way into the far rear corner of a little-used cupboard behind a large kettle. Tonight I clanked through the pots and pans and dug it out for a quick post.  To everyone who has been tuning in to the blog or who have emailed or commented and not gotten an answer: thanks for your patience. I will be back to posting and corresponding regularly once I return from the trip. Below, I am including some photos of our adventures so you can see what I have been up to. Since my last post about five weeks ago, we have climbed six 14ers and four 13ers, including a three-day backpack trip with one of the adventures. Whew!

As I prepare for Rainier, I am starting to get a little nervous about some ostomy-related things. I am wondering what it will be like trying to discreetly swap out closed-end pouches while roped up on a team, including some strangers.  I hope I can keep up with my hydration needs.  I am afraid that during short breaks, all my time will be used dealing with my ostomy and that I won’t have time to eat and refuel.  Will my ostomy supplies make my pack heavier than everyone else’s? I know it will all be fine, but there are a lot of unknowns on the trip.

One thing that has really helped me not worry are the amazing staff at the guide service we will be using, International Mountain Guides. I have explained what having an ostomy is like to them and have asked for their suggestions on everything from dealing with poop on the mountain, to questions about hydration and accommodating my gluten-free diet.  It is always a little awkward bringing up the intimate details of life with an ostomy, but being open about it helps me get the answers I need. The staff has made the process so easy. I feel comfortable asking them anything which definitely helps quell the fears.

In many ways though, I love the uncertainty. The best thing I have discovered for becoming confident with my ostomy is to throw myself into new situations wholeheartedly. Through those occurrences, I learn that I can be resourceful and adapt to anything. I can’t wait to see what challenging experiences await me on the gorgeous ice-covered slopes of Mt. Rainier. No doubt I will come back from this adventure with my horizons stretched even farther.

On the summit of Mt. Bierstadt at 9:30 a.m. in what we thought was just a rogue misty fog cloud rolling through. Moments after this photo was taken, Doug's hair started to stand on end and our poles started buzzing. We never ran so fast down a mountain.
On the summit of 14,060 ft. Mt. Bierstadt at 9:30 a.m. in what we thought was just a rogue, misty cloud rolling through. Moments after this photo was taken, Doug’s hair started to stand on end and our poles began to buzz. We never ran so fast down a mountain.
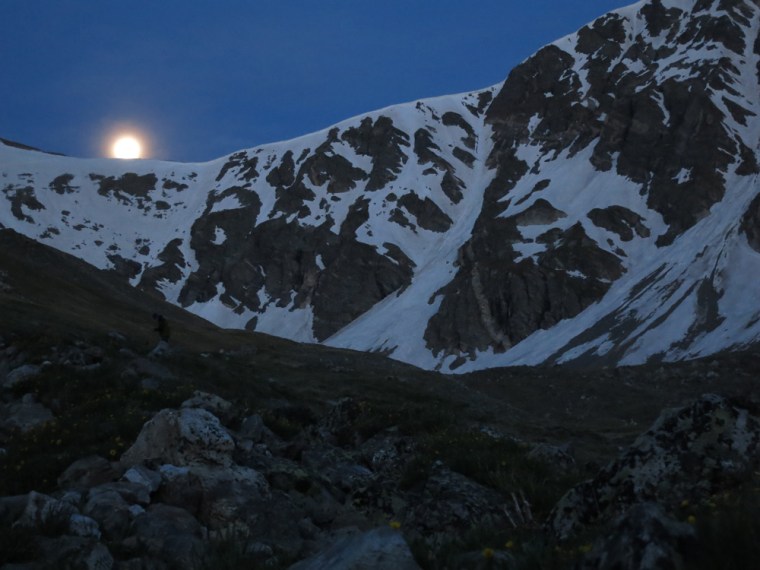
Gorgeous views often come with early starts. The moon sets over the saddle between Grays and Torreys peaks.
Breathtaking views often come with early starts. The moon sets over the saddle between 14,270 ft. Grays Peak and 14,267 ft. Torreys Peak.
Taking a breather and soaking in the view after hoofing it up a steep gully on our acent of Mt. Evans with a 45 pound pack.
Taking a breather and soaking in the view after hoofing it up a steep gully on our ascent of 14,264 ft. Mt. Evans with a 45-pound pack. We make our packs heavy for training by carrying bags full of water. I actually threw in a few rocks for extra weight before heading up this slope:) I definitely won’t be doing that on Rainier!
Resting with my 55 lb pack on an 3-day backpacking trip to climb Mt. of the Holy Cross. After a night of sleep at basecamp, our route asended the ridge on the right side.
Resting with my 55 lb. pack on a three-day backpacking trip to climb 14,005 ft. Mount of the Holy Cross. After a night of sleep at base camp we ascended the ridge on the right side of the photo.
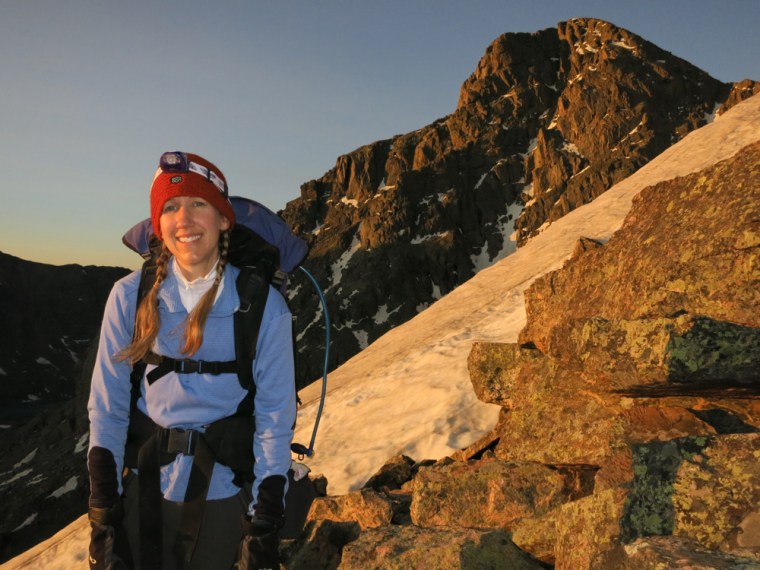
A gorgeous early morning sunlight greets us mid-route after starting our hike up Holy Cross at 3 a.m.
Spectacular early morning sunlight greets us mid-route after starting our hike up Mount of the Holy Cross at 3 a.m.
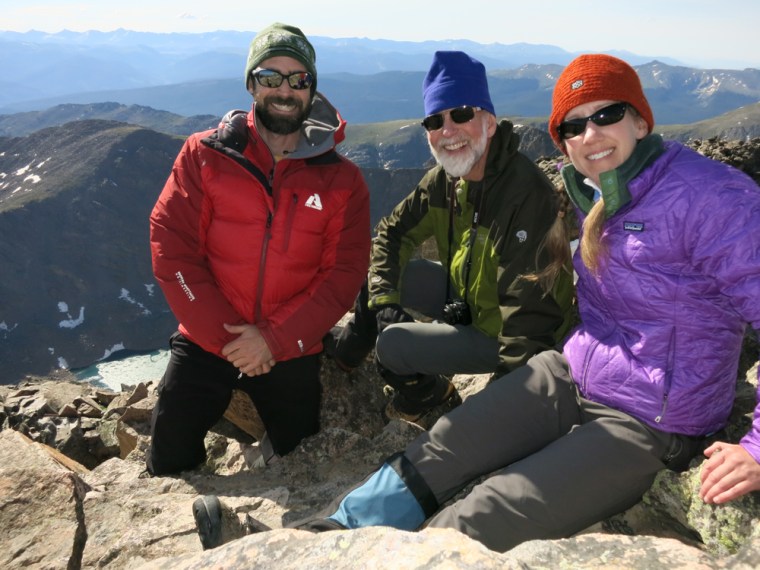
On the summit of Mt. of the Holy Cross.
On the summit of 14,005 ft.  Mount of the Holy Cross.
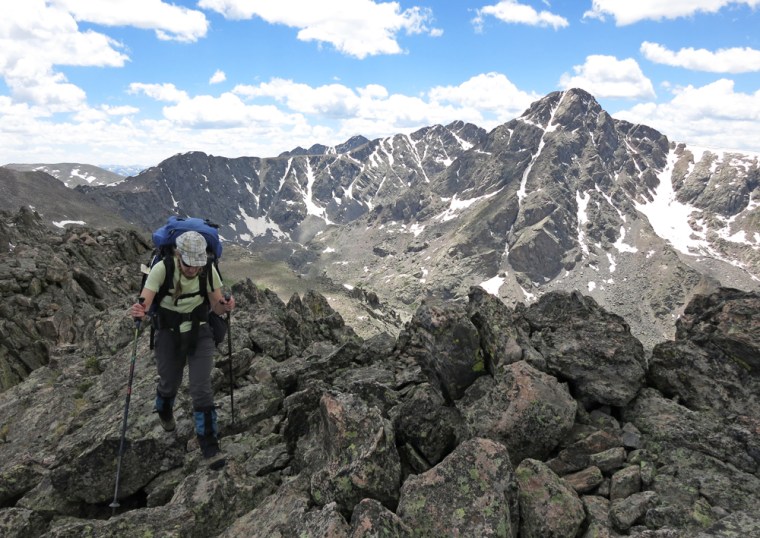
Descending from Notch Mountain. Mt. of the Holy Cross, which we hiked the day before, can be seen in the background.
Descending from 13, 237 ft. Notch Mountain the day after ascending Mount of the Holy Cross–obvious in the background.
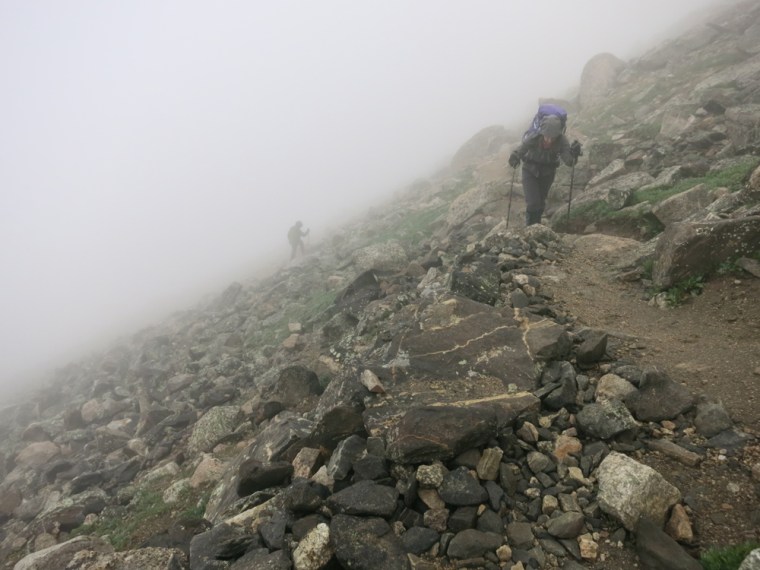
Ascending Mt. Yale with my monster pack in some early morning fog.
No Views from the summit of Mt. Yale on this day.
There were no views from the summit of 14, 196 ft. Mt. Yale on this day.
Yet another 3 a.m. alpine start as we leave for Turner Peak.
Yet another 3 a.m. alpine start as we leave for the 13er called Turner Peak, the day after hiking Mt. Yale.
On the summit of Turner Peak. The day before we climbed Mt Yale which is the peak in the center behind the mist cloud.
On the summit of 13,233 ft. Turner Peak. The day before we climbed Mt. Yale which is the peak in the center behind the mist cloud.
For our final training climb we did a chain of peaks: Mt. Chapin, Mt. Chiquita and Mt. Ypsilon. Just for fun we reascended Chiquita on the way back to throw in a little extra elevation gain.
For our final training hike, we did a chain of peaks: 12,454 ft. Mt. Chapin, 13,069 ft. Mt. Chiquita and 13,514 ft. Ypsilon Mountain in Rocky Mountain National Park. Just for fun, we reascended Chiquita on the way back to throw in a little extra elevation gain.
On the summit of Mt. Ypsilon. The next time we are at this elevation will be during our Mt. Rainier trip.
On the summit of 13,514 ft. Ypsilon Mountain. The next time we will be at this elevation will be on Mt. Rainier.

How to select ostomy pouch styles for the outdoors

Last weekend I was reminded why I love using closed-end ostomy pouches on hikes and climbs. I was up on a long ridge between between Loveland Pass and Mt. Sniktau in Colorado. Though it was a gorgeous 75-degree day down in Denver, up at 13,000′ it was blustery and frigid. We left the house at 4:15 a.m. so that we would be done with our climb and back to the car before afternoon thunderstorms came in. I emptied my appliance before leaving the house, but by the time we reached the summit of Mt. Sniktau at around 9 a.m., my pouch was reaching its 1/3 full point. This is typically when I like to empty it.

Problem was, no ideal place to empty a pouch could be found on the entire ascent. The wind was howling and shelter was non-existent. On top of this, there were many feet of snow on the ground. The few places where there was exposed earth, it was frozen solid.  There was also no way to go off of the ridge to empty away from the trail. Precarious cornices sat 50 feet to the east of the route and dangerous avalanche slopes could be found 50 feet to the west. Emptying would have meant draining my pouch in the snow close to the area where people travel. Once the snow melted, fecal matter would have been left on top of the ground in a popular area. This was one of those instances when wearing a two-piece ostomy system and using closed-end pouches was almost a necessity.

The ridge between Loveland Pass and Mount Sniktau provided few places to empty a pouch.

If you are just finding out that you will be having an ostomy, or are recently out of surgery you may find the sheer number of ostomy appliance choices to be overwhelming. Closed-end, drainable, one-piece, two-piece — what do all these mean and which ones are best suited for various outdoor adventures? A lot of these choices come down to a matter of personal preference.  The goal of this post is to share some information on the basic types of appliances and explain how I utilize the various options on peaks and trails. I’d also like to hear what you’re using in the outdoors.

First, ostomy appliances come in one- or two-piece options. With a one-piece appliance, the wafer (also sometimes called a skin barrier) is permanently joined to the bag and cannot be separated–you’re literally stuck with this pouch until you remove the whole thing. The benefits of this style is that it has a low profile and sits very flat against the abdomen. The disadvantage is that because the wafer and bag cannot be separated, you lose the flexibility of being able to swap out different types of pouches unless you take the whole system off your belly. I used one-piece drainable pouches for the first five months after surgery, and on one of my very first major outdoor trips as an ostomate: a three-night early spring backpacking excursion. The ground was snow-covered and frozen on this adventure and I ended up trying to drain my pouch into plastic bags so that I could pack out my waste. It didn’t go well and I got output all over my pants and all over the outside of the bag I was trying to drain into. From that point on, I recognized that a two-piece system would be a better option for my outdoor trips.

In a one-piece ostomy system, the wafer is permanently attached to the pouch. Because of this, swapping out different pouch styles on the same wafer is impossible.
In a one-piece ostomy system, the wafer is permanently attached to the pouch. Because of this, swapping out different pouch styles on the same wafer is impossible. Pictured is a Coloplast SenSura X-Pro drainable one-piece appliance.

With a two-piece appliance, the wafer and pouch are separate and attach to each other with a plastic ring that snaps together much like Tupperware. Once the wafer is on your belly, different styles of pouches can be put on or taken off this ring. These systems are a little higher profile because of the plastic ring. However, there is much flexibility in using them because you can swap out different types of pouches depending on your activities. Due to this, a two-piece appliance is my clear choice for outdoor adventures. Also, I find that even with the plastic ring, two-piece ostomy systems are undetectable under my clothing.

There are also choices for the pouch portion of an ostomy appliance; they come in drainable or closed-end versions. Drainables have a tail that unfolds so that output can be emptied out of the bottom. Once the tail of the pouch is wiped clean, it rolls up and closes with either a clip or a Velcro strip until it needs to be emptied again. A person with an ostomy may use the same drainable pouch for multiple days.

Closed-end pouches have no tail. Once they fill up, they are designed to be thrown away full. Due to their simpler design, they cost less per bag than drainable pouches. However, most ileostomates don’t use them the majority of the time. Due to output coming directly out of the small intestine having higher water content, those with ileostomies usually have to empty their pouches six times a day or more. Even though closed-end pouches have a cheaper per-pouch cost, going through so many  in 24 hours makes them impractical and not cost-effective. Generally closed-end pouches are better suited for those with colostomies who may only have to empty a few times a day. That said, there are occasions when closed-end pouches are the perfect tool for those with ileostomies too.

With a two-piece system, the pouches can be separated from the wafer. On the right is a drainable pouch and on the left a closed-end one.
With a two-piece system, the pouches can be separated from the wafer and swapped out. On the left is a drainable pouch and on the right is a closed-end one. Pictured clockwise is a Convatec Sur-fit Natura drainable pouch with an Invisiclose tail, a closed-end pouch, and a Durahesive cut-to-fit wafer.

Drainable pouches are my preference most of the time, even on wilderness adventures, as long as I can find a good place to empty. Packing out full closed-end pouches can be heavy due to the high water content of ileostomy output. In fact, I once weighed the trash bag that contained a day’s worth of full closed-end pouches after an all-day climb and it came in at 3.5 pounds! Multiply that for trips that may be several days long and you can see why I use closed-end pouches only when necessary.

However, my hike on the ridge is an example of an ideal time to use a closed-end pouch. I also like using closed-end pouches in other places where it is impossible to empty: on cliff faces when climbing, on rocky peaks where it is impossible to dig a cathole, and on crowded urban trails. Though I haven’t been on a river trip with my ostomy yet, I can also see them being very useful in these situations when one cannot get far enough from a water source to empty. Also, it takes longer to dig a hole in the ground and properly drain my pouch when in the wilderness than to swap out a pouch. There have been a few times when I have been caught in storms and have decided to swap to a closed-end pouch instead of draining in order to minimize my exposure to lightning, high winds, cold rain or other dangerous elements.  Both drainable and closed-end options also come in smaller sizes if one wants a tinier pouch for some activities such as swimming.

It is also worth mentioning that there is one other style of two-piece ostomy appliances; they are called adhesive coupling systems. Instead of having a plastic Tupperware-like ring like traditional two-pieces, the wafer has a smooth plastic area and the pouch affixes to this with a sticky adhesive ring. The benefit of these is that, without a plastic ring, they are very flat on the belly. You can still swap out pouch styles by peeling off the old bag from the wafer and sticking on a new one. However, I find that adhesive coupling appliances don’t work well on my outdoor trips . When I peel off the full pouch, a little output inevitably gets on the place where I am supposed to affix a clean one. I then have to fully clean this in order to get the fresh pouch to stick. It ends up being too messy and hard to deal with in the wilderness where there is no water to clean up with. I find it much easier to use the traditional two-piece appliances with plastic rings. Even if a small bit of output gets on the ring, it still snaps together fine and is not messy at all.

In adhesive coupling two-piece systems, the wafers and pouches stick together with an sticky ring. They are low profile, but I find them messy to swap out when on outdoor trips.
In adhesive coupling two-piece systems, the wafers and pouches adhere together with an sticky ring. They are wonderfully low profile, but I find them messy to swap out when on outdoor trips. Pictured on the left is a Convatec Esteem Synergy adhesive coupling system and on the right is a Coloplast SenSura Flex wafer and pouch.

A downside of closed-end pouches is that they are a disposable item. I try to make the best environmental choices possible in my daily activities, so I do sometimes cringe when I throw away my bag of closed-end pouches after a climb knowing I have added more to the landfill than I would have if I would have stuck to a drainable that day. I try to remind myself that I do this for a medical reason and to deal with a basic life process of bodily waste removal. In other aspects of my life, I try my best to be gentle on the earth. I take reusable bags to the store, drive a fuel-efficient vehicle, use public transit, buy organic produce to protect wildlife from pesticides, use eco-cleaners to keep toxins out of our water supply, recycle every item possible, and make wise purchases. I hope that, in the grand scheme of things, the impact of the pouches that I throw away is small. I really do only try to use them when absolutely necessary.

When I was on Mount Sniktau on Sunday and decided draining wouldn’t be possible, I even began to wonder if I could find a good place to take off my full pouch and put an empty closed-end one on. It was so windy and there were people everywhere on the ridge. Once my pouch was 1/3 full, I couldn’t find a place to make the switch. I decided I would wait until later to deal with it. The good thing about my ostomy is that, unless I eat something that irritates my stomach and gives me pure liquid output, I have plenty of time to get around to emptying. It is rarely urgent.

On the summit of Sniktau. It was really cold and windy up there with very little shelter.

As I made my way down the ridge from the summit, more and more people were coming up and I realized I couldn’t be fussy with my site selection for swapping. My pouch was now 1/2 full and I needed to take care of it soon. I ran ahead of Doug and his dad but also saw that some people were heading towards me.  I had about 5 minutes before they reached me so I tossed my pack to the side of the trail next to a small pile of rocks and tried to create a wind break. I then dug my supplies out and tied a small doggie poo bag to my pack strap so it wouldn’t blow away (this is what I would throw the full pouch into). Next I pulled down the front of my pant waistband, took my hernia prevention belt off, and quickly swapped out the full pouch for the clean one. Just as I had gotten my clothing back into place and was bagging up my trash, the two hikers approached me. I said hello and we talked for a second about the route. They clearly had no idea I had just dealt with my ostomy. To them, from a distance it probably looked like I was futzing around with my clothing or backpack. One can very discreetly manage their ostomy on the trail with a two-piece system and closed-end pouches.

With all the options out there, it pays to experiment with all the different brands and styles. Don’t feel like you have to use only one type of appliance. Have a dressy occasion where you definitely don’t want your appliance to show? Wear a sleek one-piece that week. Hanging out at the beach all day? Go for a mini drainable pouch that won’t hang out beyond the bottom of your suit. And if, like me, you find yourself needing to empty on a wind-swept ridge with sheer drop-offs on both sides — a two-piece with a closed-end pouch may be just the ticket. Take advantage of all the products out there to make life with your ostomy the best it can be.

This is the spot where I swapped out my pouch. By the time Doug caught up and snapped this photo, I was finished managing my ostomy and was changing my camera battery. However, from a distance swapping out a pouch doesn't look much different than this. It can be done very discreetly.
This is the spot along the trail where I switched out my pouch. By the time Doug caught up and snapped this photo, I was already finished managing my ostomy and was changing my camera battery. However, from a distance, swapping out a pouch doesn’t look much different than this. It can be done very discreetly.

Back in the wilds!

Heart pounding, quads burning and lungs barely able to keep up — I could not believe I was standing at 13,000 feet again. Yet there I was! Doug and I spent the weekend in Breckenridge with his parents. Our rental was a mere two miles from the Quandary Peak trailhead, so yesterday we decided to head up the trail to see how far we could get.

Doug and I take a break along the Quandary Peak trail.

I had no intentions of making the summit, and just wanted to be out in the mountains moving my body again. With the sudden onset of groin pain in mid-January and an MRI in February that showed gluteal tendinosis in my hip, I had been doing lots of physical therapy and taking a break from hiking. In fact, I was starting to think that my Rainier attempt in July might not happen. I tried to keep my fitness up with biking and swimming (doggie paddling really… I cannot do any overhead swimming strokes because it hurts my shoulder avascular necrosis (AVN) too much). However, those activities hardly replicated the intensity of climbing big peaks with heavy gear at altitude.

Fortunately, last week I got some good news at a much-anticipated appointment with a new orthopedic surgeon. After looking at my MRI, he didn’t see anything in my hip except for the gluteal tendinosis. However, he does not think that the tendinosis is causing the groin pain I have been experiencing because that type of injury typically causes outer hip soreness. This makes sense as the physical therapy I have been doing for the last two months has really helped some of the pain in the outside of my hip, but did little for the groin. The bottom line is that the doctor did not know what was causing the soreness in that part of  my hip; the joint looks healthy. He said sometimes they really can’t find anything and oftentimes these issues resolve on their own with time. He thought it was fine to start training for Rainier again as long as the pain didn’t worsen.

I also talked to him a lot about my shoulder AVN. Though I really liked working with the doctor that diagnosed the condition back in December, this particular orthopedic surgeon has more experience working with patients who have AVN. After looking at my MRI, he felt the AVN in my shoulder may not cause me any further issues. He said the necrotic area is small and that most of the cases he has dealt with have involved a much larger percentage of the humeral head. As a result, it is quite possible that I won’t ever need a joint replacement. Of course, he did say the exact progression is impossible to predict. The doctor said I was really, really lucky that I have not developed AVN in my hip. He has never had a patient that had it in the shoulder that did not also have it in the hip. (Could I be this lucky?!) Though he said it is always possible to develop AVN in another joint at any time down the line, the more time that passes after taking steroids, the better the chance is that this won’t happen. He mentioned that there are a lot of factors at play with steroid-induced AVN that doctors don’t understand. For instance, the window of time for developing AVN after stopping steroids appears to be a lot longer for some people and with some diseases than others.

It was a huge relief leaving the doctor’s office knowing that I had just been given the okay to get back to all my activities. And with my shoulder also feeling so much better, I happily started planning all my new adventures.

Unfortunately, my body wasn’t quite ready to cooperate. The morning after my appointment, I was bending over to pick something up off the floor and I felt a pull in my Achilles tendon. I was so disappointed. I had waited so long for that appointment with the new orthopedist and now I had developed an entirely new issue less than 24 hours later! This is so typical for me. There were many times when I was recovering from ostomy surgery when I would tell my surgeon everything was great at an appointment and then have something go wrong the following day.

Luckily, I had an appointment with my physical therapist that evening so I could at least discuss my latest joint woe with someone. He felt I had probably just strained the Achilles tendon a bit and gave me some stretches and strengthening exercises. Because my pain was minor, he thought I could still train as long as the movement of hiking didn’t irritate the tendon. Obviously if the issue starts to become more painful I will head back to the orthopedic doctor.

So, I wasn’t sure what to expect on the adventure yesterday. Much to my surprise, I felt great and ended up hiking around 5 miles round trip with a couple thousand feet elevation gain, making it to the 13,000′ shoulder of Quandary Peak. My Achilles did not hurt and my hip felt okay. A few times along the way I just stopped and listened to the beautiful sounds of being on a remote mountainside again. I could hear the wind in the tree branches and the snow crystals hitting my jacket and it felt amazing to be out there. I actually pinched myself a couple of times to make sure it wasn’t a dream. The feeling of happiness felt so similar to those first wilderness hikes after my ostomy surgery when I realized that I would still be able to do an activity I loved so much.

Returning from a post-lunch ostomy pouch swap. With the deep snow, I use closed-end pouches instead of drainables and then pack out the full one.
Returning from a post-lunch ostomy pouch swap. With the deep snow, I use closed-end pouches instead of drainables and then packed out the full ones.
Nope. I am not dreaming and pinch myself just to make sure!
Nope. I was not dreaming and I pinched myself just to make sure!
We reached a high point of 13,000' on the shoulder of Quandary Peak. The summit can be seen in the distance.
We reached a high point of 13,000′ on the shoulder of Quandary Peak just as another snow squall came in. The summit can be seen in the distance.

I look forward to the many mountain trips on the horizon as I start to train for Rainier again. If If I end up not summiting the big peak due to all the recent training hiccups, I will be okay with that. If the fun I had today is any indication, just being on that massive and beautiful mountain is going to be a breathtaking experience in and of itself.

Relaxing in the hot tub after our hike with a perfect view of the peak.

Reaching out (feat. new video)

Last Tuesday evening, I left work in a gorgeous swirl of falling snow but promptly got stuck in standstill traffic due to slippery road conditions. I half-thought of exiting the freeway and heading home, but the destination was too important and I knew that getting there would soon melt away any stress that had accumulated on the drive. In fact, it was almost guaranteed that I would leave the event in a good mood. I always do. So where was I heading that had me filled with such eager anticipation?

The fourth Tuesday of every month is my Ostomy Association of Metro Denver meeting. I started going to these meetings as soon as I was healed enough after surgery to get to them and quickly discovered how valuable they were. When you have a condition that is hard to talk about with most people, there is a feeling of instant comfort that comes from being surrounded by others who immediately understand what you are going through. A place where it is okay to talk about normally taboo subjects such as gas, rectums and bowel movements. Now that I have been attending the meetings for almost two years, I cannot imagine not having this support system in my life. I absolutely love talking to those who are facing or recovering from surgery and doing what I can to offer encouragement. I head home from every gathering wishing I had more time to talk to everyone and eager for next month’s meeting to arrive.

One thing that I hear many young people on IBD and ostomy internet forums say is how they often walk into such meetings and feel that they are the only one in their age group there. Many times these people don’t come back for this reason, and I think it is really unfortunate. Regardless of age, everyone can relate to the overwhelming emotions that come with ostomy surgery. Though different for each person, we all have stories of difficult times, fears we are facing, successes we are celebrating and hopes and dreams for our lives beyond illness. Coming together to share our experiences and thoughts on these things can offer profound opportunities for healing. I love the conversations I have at the meetings and learn something from every single person there whether they are 25 or 70 years old.

And guess what? If you wish that there were more people at the meetings your age– stick around. The next time someone else your age is nervously walking down the hall towards the meeting room and peeks in, they will see you there and feel less apprehensive. If that person chooses to also come back next time, it has a ripple effect and soon the group becomes more diverse. Make the meetings be what you want them to be by participating and returning for the next one.

If you don’t have access to a local support group to meet people in person, there are many groups to join on the internet. I wrote a post a while back about the importance of reaching out to others online. One of my biggest twists of luck when I was in the hospital and facing the possibility ostomy surgery was that my room had a good internet connection. Whenever my favorite nurse would see me typing away on my computer at an intense pace, she would always remind of how fortunate I was to be in that room because many of the others on the floor had poor Wi-Fi signals. I don’t know what I would have done without my computer. It became a lifeline from my isolated hospital room and allowed me to meet others who had gone through surgery and gone on to lead active lives.

Because of my own experience in reaching out for help when I was sick, it is a huge priority of mine to try to answer every single comment and email I receive on this site. Sometimes it takes me a little while due to a busy schedule, but you will hear from me if you write. Last fall, an email appeared in my box from another local adventurous ostomate: Lewis Benedict. That initial contact led to other opportunities to meet up including a recent hike of Twin Sisters Peaks in Rocky Mountain National Park. Lewis is now working on his own ostomy awareness website, ostomatevillage.com, and was even on cover of The Phoenix magazine this quarter! I am so proud of his accomplishments and look forward to many future adventures with Lewis and his wife, Tara.

On top of Twin Sisters Peak in Rocky Mountain National Park with Lewis and Tara of Ostmate Village. Check out the video below for more on the adventure!
Our group (including Lewis and Tara of Ostomatevillage.com) poses atop one of the Twin Sisters Peaks in Rocky Mountain National Park. Check out the video below for more on the adventure!

I am thankful everyday that I have met so many amazing people through my ostomy association meetings, OstomyOutdoors.com, and other websites and social media. You all inspire me to no end and help keep me motivated when my own life presents challenges.

I am going to end this post with a video of the hike with Lewis mentioned above. I hope it provides some inspiration to get out there and meet other people with ostomies. If you are feeling alone while facing or recovering from surgery, or if you just want to meet other people who have been through similar things, know that there is a strong ostomy community out there. You just have to reach out.

Dealing with the anxiety of a new condition

Happy holidays everyone! I hope that you are having a joyous season and are looking forward to the New Year.

After a rough week, some holiday fun is exactly what I needed. I had several days off from work, and got out to do some active things to get my mind off my recent avascular necrosis (AVN) diagnosis. On Saturday, I did a Rainier training hike up Bear Peak in Boulder, CO, with Doug and his Dad. The hike gained over 2,000 feet of elevation in roughly 3 miles and provided a great workout. I found that my pack did not bug my shoulder as long as I tightened the hip belt enough so that the weight was carried mostly on my hips (thank goodness for a great stoma placement that sits below my pack’s waist-belt).  I usually use two hiking poles, but skipped using the left-hand one so that shoulder wouldn’t have to work too hard.

Hiking with one poll while resting my left shoulder.
Hiking with one pole while resting my left shoulder.
Goofing around and testing out my shoulders on the summit of Bear Peak.
Goofing around and testing out my shoulders on the summit of Bear Peak (8,461 feet).

The next day I went to the gym for some Zumba (minus most of the arm motions) and then did a leg workout on the weight machines. On Christmas Eve Doug and I spent a little time up in Boulder where we enjoyed lunch at an Italian restaurant. When we got home, I baked gluten-free cookies in various fun shapes including trout, dinosaurs, and Christmas trees. Next day, on Christmas, we met Doug’s parents at Loveland Ski Area, and I also called my parents in Washington to wish them happy holidays from the lodge. It was a bluebird day on the slopes, and the fresh overnight snowfall made for some awesome boarding. I was concerned that pushing myself up into a standing position on my board after falling or sitting would hurt my shoulder, but it felt okay. My body is a little sore today, but that is to be expected as it was my first day of snowboarding this season.

Enjoying Christmas at the lodge with hot cocoa and cookies.
Celebrating Christmas at the lodge with hot cocoa and one of my homemade cookies.
The sun sets as Doug and I get some final runs in.
Enjoying the mountain light after a long day on the slopes.

When I was recovering from ostomy surgery and was dealing with grief and anxiety, I found that keeping busy and getting out to do things with my family and friends helped me feel better. I am finding the same thing is true as I deal with the uncertainty of a new condition.

That said, I have also found that the anxiety levels that have come with my diagnosis of avascular necrosis have felt 100 times worse than what I experienced with ulcerative colitits and my ostomy. I think this is due to several things. First, other than anti-inflammatory meds for pain and physical therapy to help maintain range of motion, there aren’t really any treatments to pursue at this time to halt the progress of my specific case of AVN. From my previous life experiences, when I had an injury or illness, there were always steps to be taken to try to heal the condition and help things improve. It feels very new and foreign to me to have a condition that likely won’t heal and is degenerative.

The stats also aren’t as promising with AVN as they were with my ostomy. Before my ileostomy surgery, I had heard that over 90% of people who had the operation for UC were happy with the results. (I certainly am!) Though there hasn’t been much research on steroid-induced shoulder AVN, I did find a few prognosis statistics in online medical textbooks and journals:

  • 55% of those with humeral-head AVN from steroids get it in both shoulders
  • 76% of those with shoulder AVN also get it in the hips (and 2/3 of that 76% get it bilaterally)
  • 90% of those with AVN in the shoulder due to steroids eventually have it show up in another joint

Third, I am having trouble finding hopeful tales out there of people who have had steroid-induced AVN and went on to lead athletic lives. If you have had AVN related to prednisone and went on to climb, snowboard, backpack, etc., or know someone who has, please email me! When I was getting ready for my ostomy surgery, though there were horror stories out there, I was able to find at least some websites related to the athletic things people were still able to do without their colons. I am trying to find such inspiration for AVN.

Recently, I realized that I needed to get some help to deal with my heightened level of anxiety that came with the recent diagnosis. I couldn’t concentrate on anything, and I was a tearful, scared mess. After my fourth sleepless night in a row, I tried to lift a glass and found I was shaking so badly from anxiety that the water was practically sloshing out over the sides. I sat the glass down, and immediately emailed my primary care doctor. I must have reached her at a good time, because within two minutes my phone rang. We talked for about 20 minutes about the current turn of events and the anxiety. She made me feel so much better and told me that I had dealt with UC and my ostomy so well, but that this was likely just one thing too many for my mind to deal with. After our conversation, I decided to give some medication a try. She also recommended combining the drugs with counseling and meditation, so I have an appointment with a counselor in January and am taking a refresher course for mindfulness meditation in a couple of weeks.

I have always been very thankful that anti-depressant and anxiety medications are available. I know many people who have been helped with these drugs. However, this was my first experience taking them and, just like with my ostomy surgery, I found myself wrestling with stigmas. In my circles especially, where my friends and I are into holistic treatments and solving things through diet and exercise, I really had to fight to not judge myself for needing to take this medication and for being unable to solve my problems in a more natural way. But I also knew I was miserable and that the path to wellness isn’t always so simple. It is important to use all tools available. I am hoping that counseling, medication, meditation, exercise, physical therapy and the support of my family and friends will form the perfect combination to get me through this.

With that said, I promise that I will get back to writing about more things ostomy soon. Before finding out about the AVN, I was working on a post about some great ostomy wraps. Stay tuned for that and my continued Rainier-training adventures.